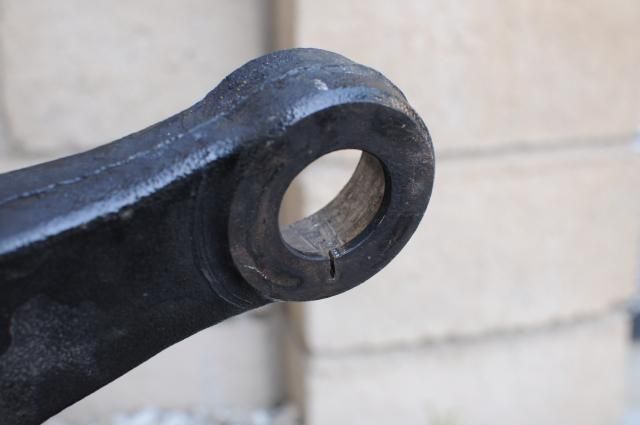
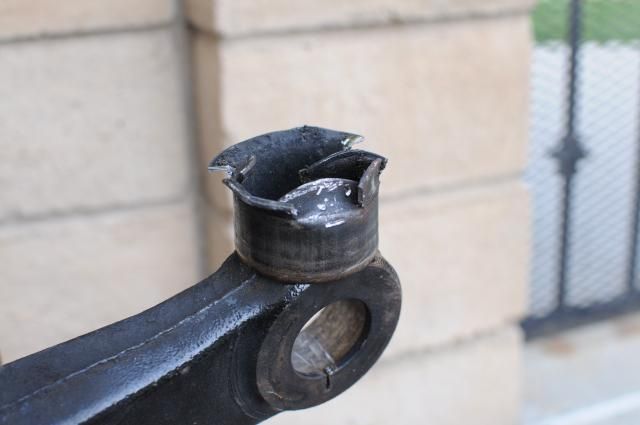
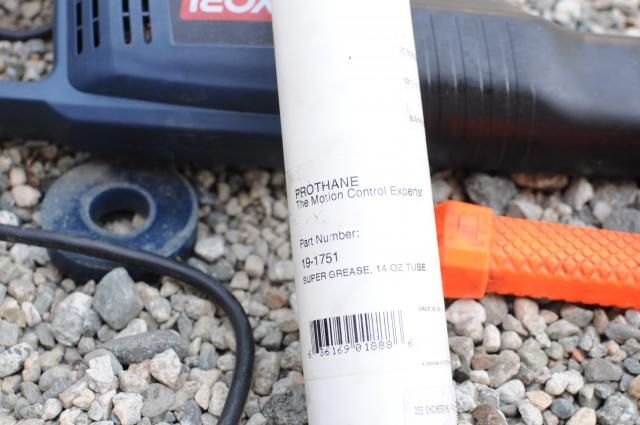
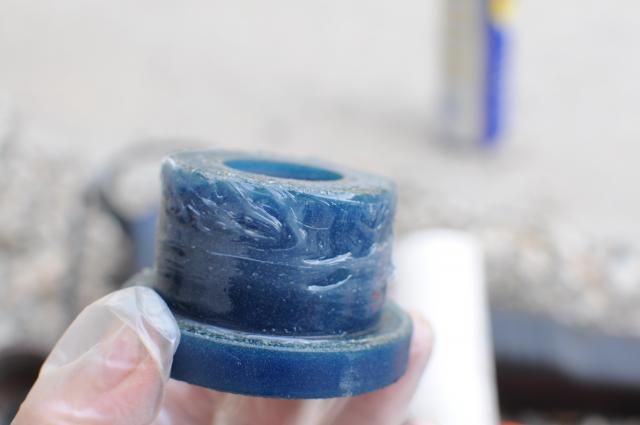
Dropped the stock diff out, only to realize the 4.26 diff that I had welded and waiting to go in had its ear mount bushings burnt out. I had done this ages ago when I wanted to put in the polurethane, but like most of my projects, I got bored halfway through and left them as is. I didn't know this until after I burnt them out, but I wasn't actually supposed to burn them out until after the bushings and the sleeves that enclosed it was pounded out. Whoops. So, I had to resort to pretty shady backyards mechanics and a sawzall to get the outer sleeve out. Cut through the ear mount on the pumpkin to eventually cut through the sleeve Then greased up the polyurethane bushings that a member on clublexus is selling. the bushings were a little loose, but it seems to do the job just fine. Used the super sticky grease that Prothane sends along with their polyurethane bushings. Installed the diff in the middle of the night since wrestling the diff in and out without dropping the exhaust too much was quite the pain. Next time around, my lazy ass will not try to work around that and will just drop the exhaust from the beginning.
I'm noticing a lot of knocking and whining, but I'm not sure if it's 1. just the sound welded diffs make, and 2. the increase in sound transfer from the poly diff bushings. Been dd-ing the sc on this for a bit now and no problems have come up, so I should be in the clear.
The reason why I have to dd the sc is, again, b/c scions suck. Finally got around to putting some time into the tC by first dropping the subframe, and eventually dropping the tranny. Oh herro, problem ACT.
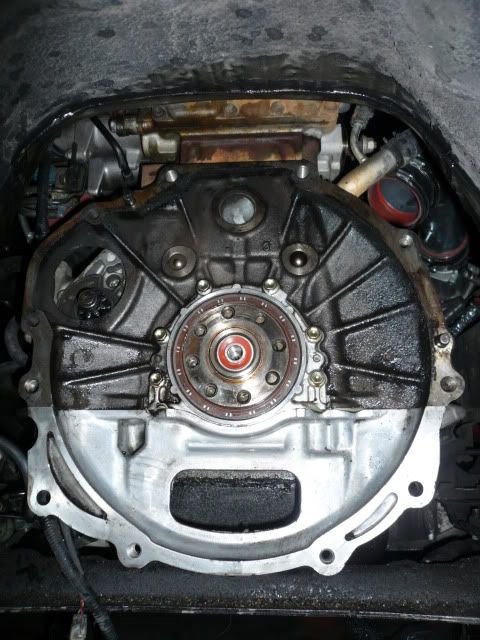
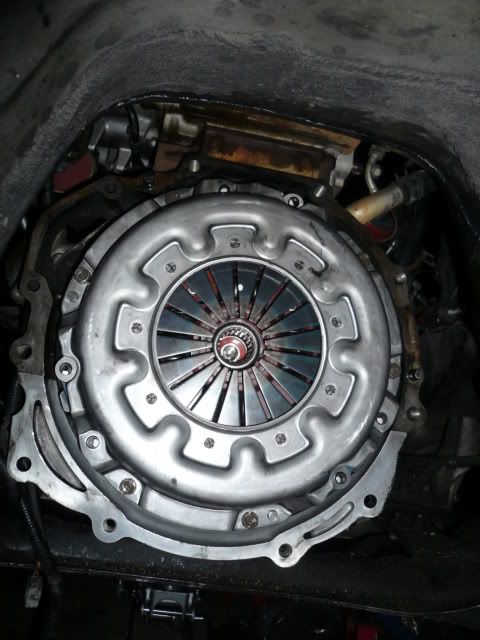
The 2 bits lying on the diaphragm springs were chillin it between the clutch disc and diaphragm springs, keeping the springs from having their full range of motion and thus, no clutch disengage. Gotta get a new PP, and possibly a new disc.
I'll also have to decide whether or not I want to take this chance to change out a lot of the tC's front end stuff. motor mounts, bushings, rebuilt tranny, etc, all of which I would've had to lower the subframe to do anyway Money pit, yes, but these were all things I've wanted to do for a while. just not sure a scion is worth the investment.
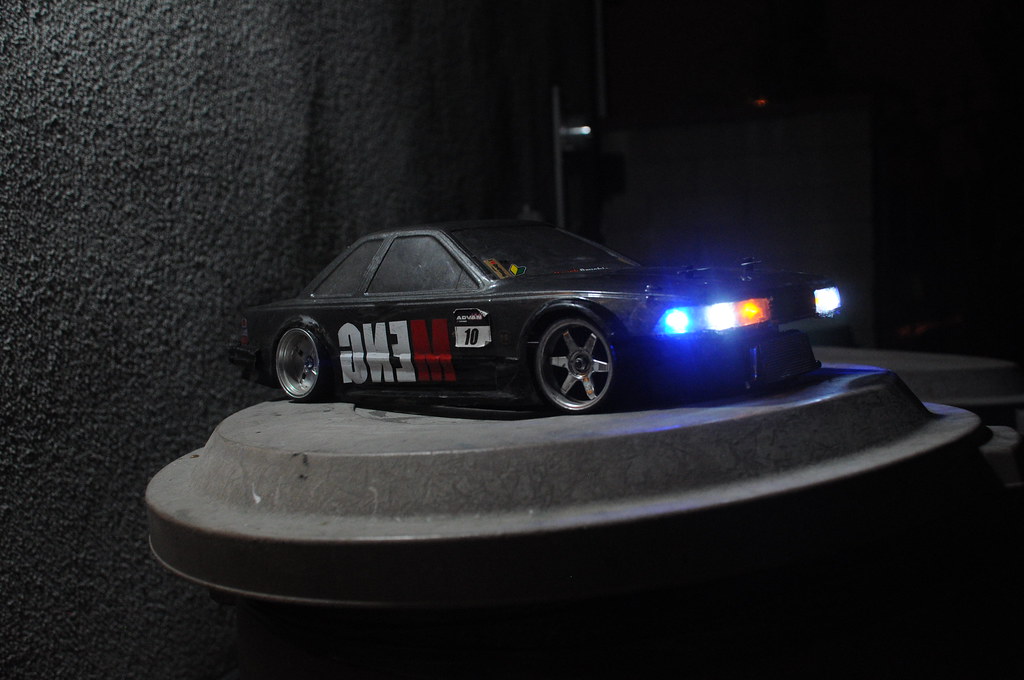
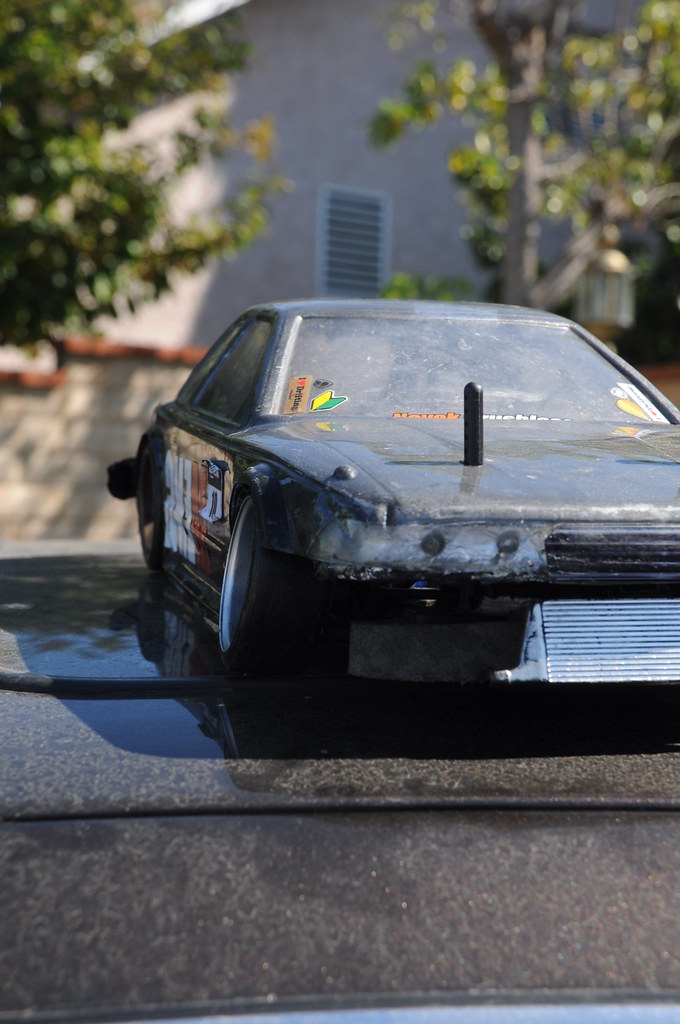
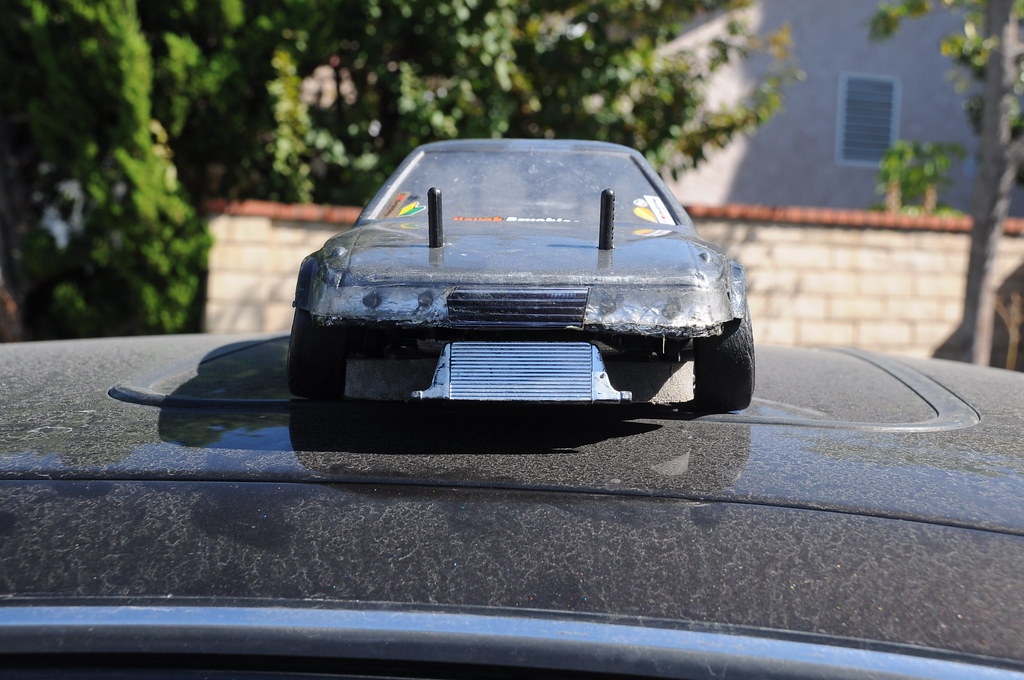
Also spent some time on my 1/10 to make it look purdy. iwillnotmissilethis
iwillnotmissilethis
iwillnotmissilethis
iwillnotmissilethis
iwillnotmissilethis
Fast forward a month or so, and I go to my first ever event. I sucked, to be honest. The staff there couldn't believe how bad the sc e-brakes are and how hard it is to lock it up without feinting and braking to transfer weight, so I spent half the day adjusting the e-brake to absolutely no avail. Credit to Brian
Got about 10 min of seat time the whole day so I had to let an instructor get his hands on the steering wheel for the car to go sideways.
The next week was the first track day that I really cared about. It was a 626drift event at the Balcony of Willows Springs. Sadly, the minute I pulled up to the WSIR gate, I hear some sort of clunking noise from my rear end. I park and jack up the rear end and find that 2 of the diff-axle bolts had gone missing, allowing the C-washer thing to swing around and snap in half. The rest of the bolts were all loose. Due to the fact that I had only 4 bolts holding an axle to the axle stub of the diff, I opted to not to push the car too much. I practiced my figure8's and donuts all day long and got the feeling of the ass end sliding around pretty down.
A little minged that I didn't get to drive the nuts off the car, I signed up for the next 626drift event a mere 2 weeks later. This event went muuuch better. Was able to practice initiating 2nd gear with a clutch kick (again, my e-brake seems to be useless, especially at my skill level of complete noob ass), leading into a switchback. Car ran flawlessly all day long, with the water temp needle moving up just a bit as we got hot fire winds coming from the santa clarita fires intermittently.
Been making super slow progress on the SC since it's now worked into my DD rotation in place of my tC. Took apart the 4.26 diff that I had lying around in the garage to prep for a potential LSD purchase. Then it was high time I resolved my broken passenger side window regulator clip by avoiding to resolve my passenger side window regulator clip. Then my front swaybar endlink snapped. So I switched over from a Male-Female heim rod end setup to a Female-Female heim rod end setup w/ a threaded rod going through the middle. Should be a bit beefier. Though, the new ends that I bought squeal like mad. After months of laying low from the bigger projects and taking care of maintenance-related stuff, some of the more purpose-oriented projects started.
In my mind, there were 3 things that were direly needed to be done to the car before it got into drifting.
1. Radiator
2. Diff
3. Drift spares
I slowly started to check each item off.
First off - Cooling.
Ever since I got my car, I've gotten around to replacing pretty much out all the fluids, other than the coolant and diff fluid. So, out with the old radiator and it's putrid used coolant/hoses and in with the new. Shiny. Already off to a good start. The fan shroud took a bit of grinding and dremeling to fit the contour of the Mishimoto's drain plugs, lower coolant hose outlet, and curves to sit perfectly flat against the radiator. The battery tray also saw a bit of grinding action in one of it's corners.
The passenger side upper bracket then got slammed against the floor to get bent down so that the radiator couldn't bounce out of it's lower mounts.
Then the new HPS coolant hoses went in with a shocking amount of brute force, and the system was bled (sorta).
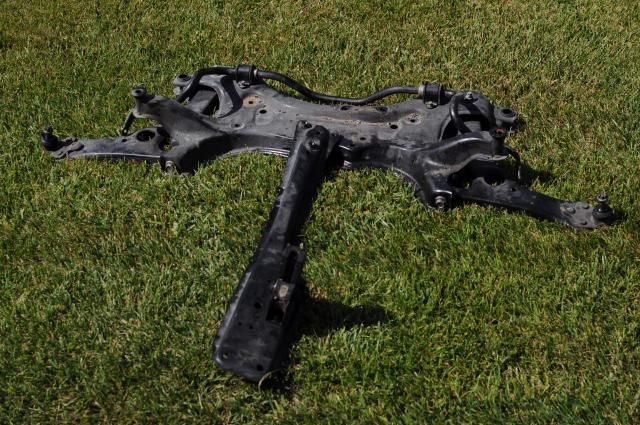
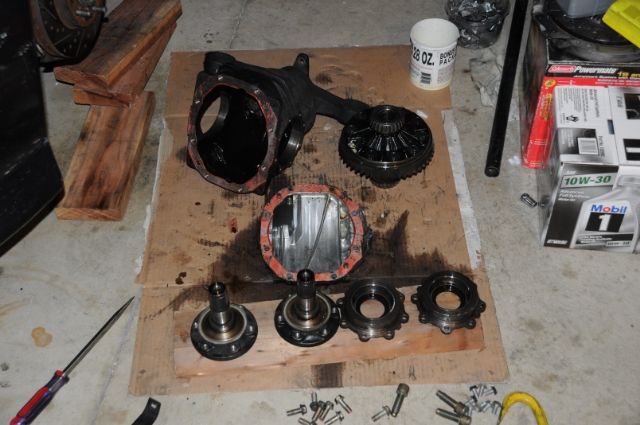
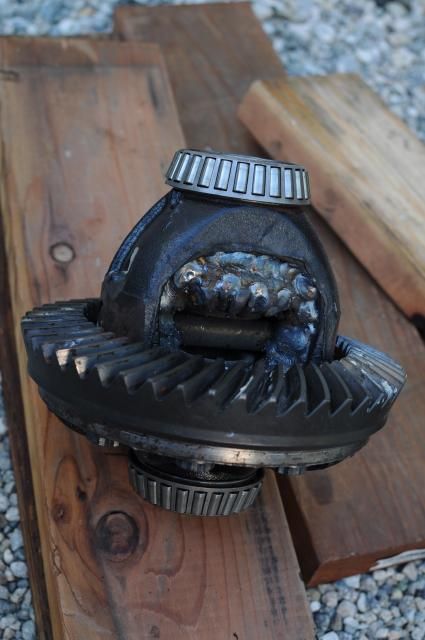
For the longest time, I was looking into a KAAZ 2-way to go into my rear end. Then I bought Works, so those plans flew right out the window. But, all my drifting friends had always suggested I go welded, at least for the time being.
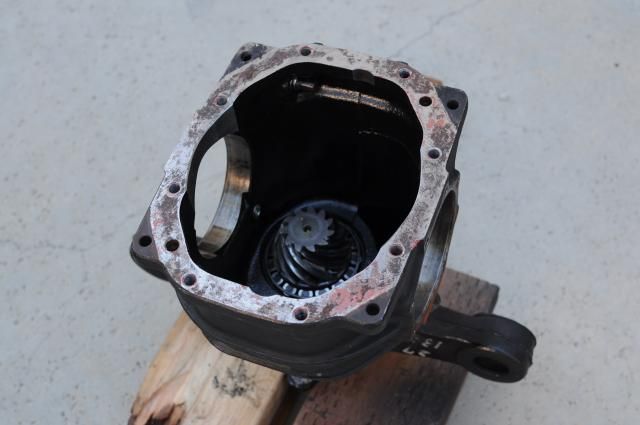
So, on my next trip down to SD to visit friends, I brought the diff that I had taken apart months ago with me to see if PBM can do the welding. Unfortunately, bringing just the diff turned out to bite me in the ass, since the spider gear of the diff had quite a bit of play, and they required the axle stubs to push in and stabilize and center the gears while welding. I took the diff home and stopped by GarageLife the next day with the diff and axle stubs and they were able to get it all welded up. After wire brushing it thoroughly just to make sure there were little to no weld splatter that could come loose while it was installed in the car, it went into the pumpkin with the bearing carriers Tip: Wite-out apparently dries way too quick to check backlash. It was dry by the time the teeth came back around and showed me no sign of backlash. I used some grease, got a very rough idea of how the mesh was, and said "F it" before starting to put the diff back together. I was only 50% sure I was supposed to put toyota orange fipg between the bearing carriers and the housing, so I put around 1 unit fuckton of it in. After taking a bit of a break to let the fipg harden just a bit, the re-build re-commenced. Now, my car has had a welded diff in it before, and for dd use, I can't say it was practical. Actually, I hated it. So, I'll be installing this diff once to check to make sure there aren't any noises (other than the 374 different noises a welded diff makes naturally), and then reverting it back to stock until track time.
The 3rd item on the list was one I've been taking care of for a long while now, hunting down decent deals on craigslist various forums.
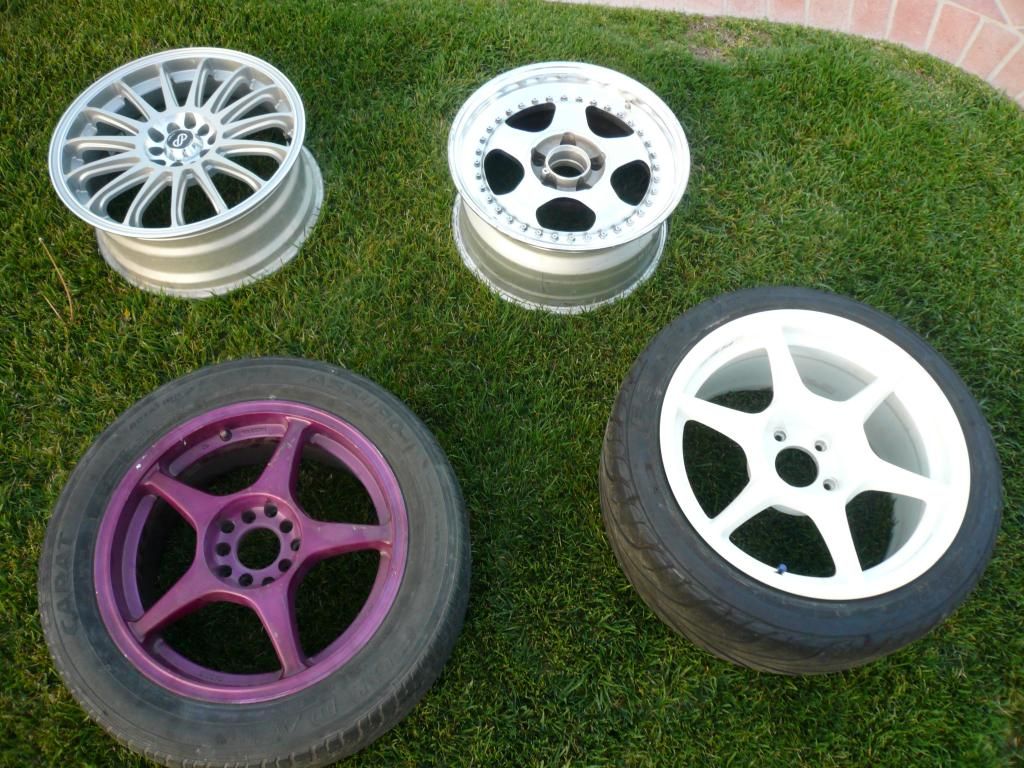
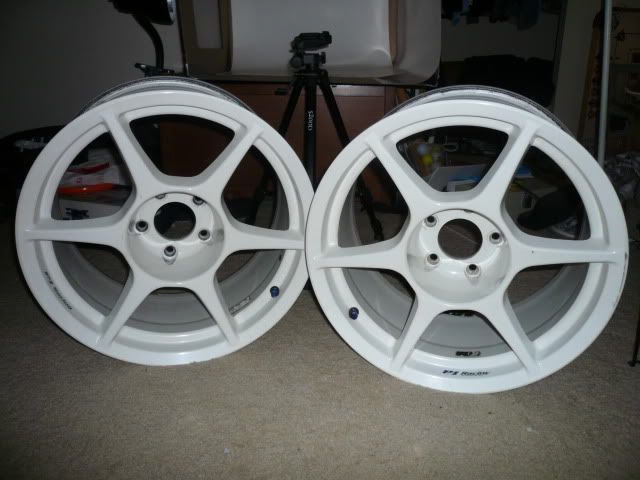
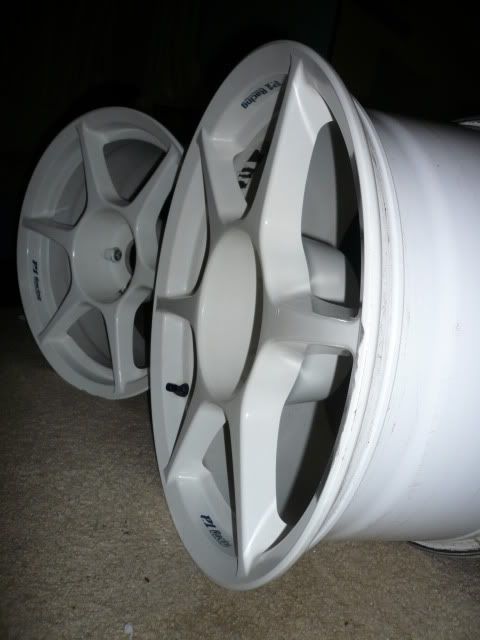
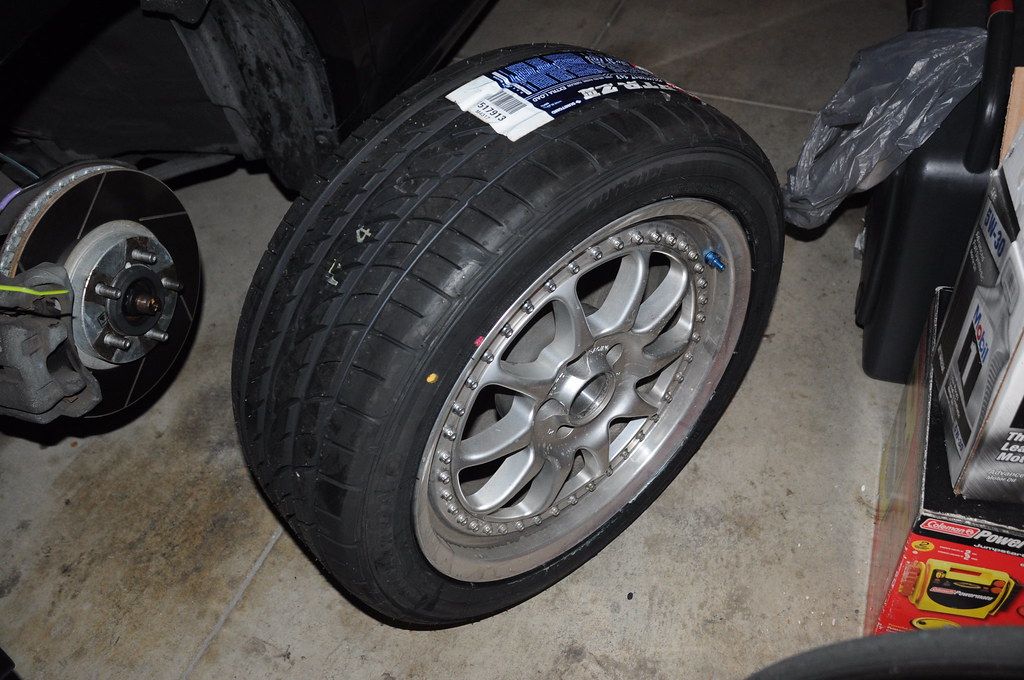
A pic of one of each pair. Top left Enkei GF-01, spec-wise is 17x7+45ish, dual drilled in 5x114.3/100 and in perfect condition. $40 for the pair, can't complain.
Top Right is some cool looking and surprisingly aggressive ARE Inc. wheel (no clue what that is). Turned out to be legit 3-piece and will most likely have 225/55(or 50)/16 tires mounted on it.
Bottom left are fabulously purple Enkei RP01, specs are unknown but they came with trash tires that seem to be holding air, so I think they'd be perfect for a noob like me.
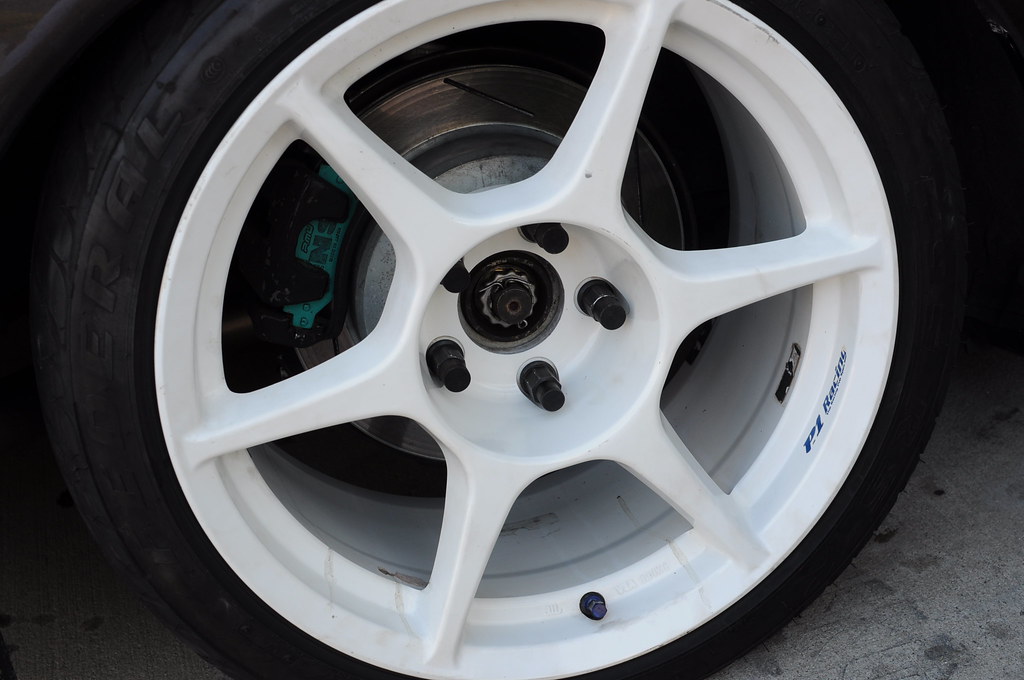
The BuddyClub P1's (bottom right) are 17x9+17 with 215/45/17 Feddy RS-R's. They'll hopefully be going up front, but when I tried them on my rears a year or so ago, they made clunking sounds, so I'll be taking them to get balanced and whatnot in a few days to make sure they're good to go.
I really hope they're fine, since I do like how the white looks with the brown
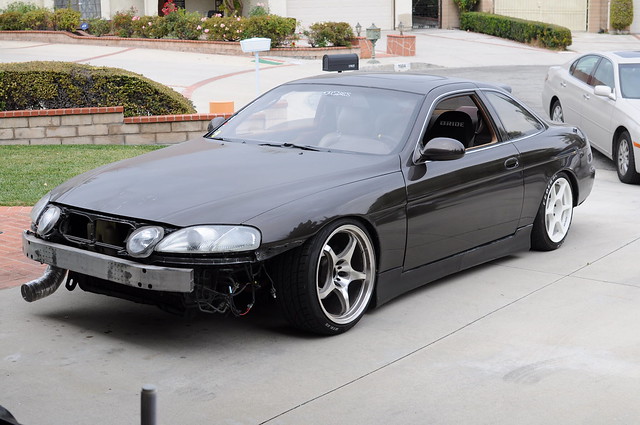
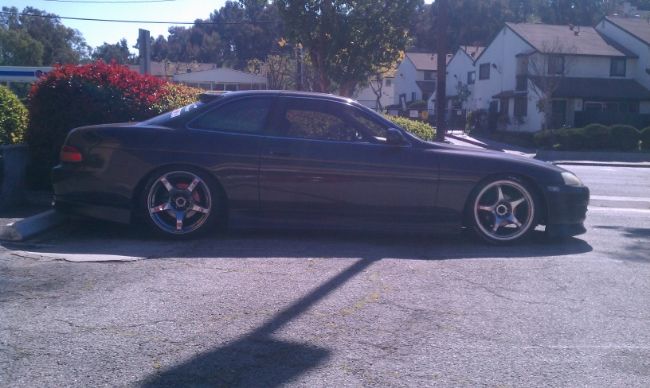
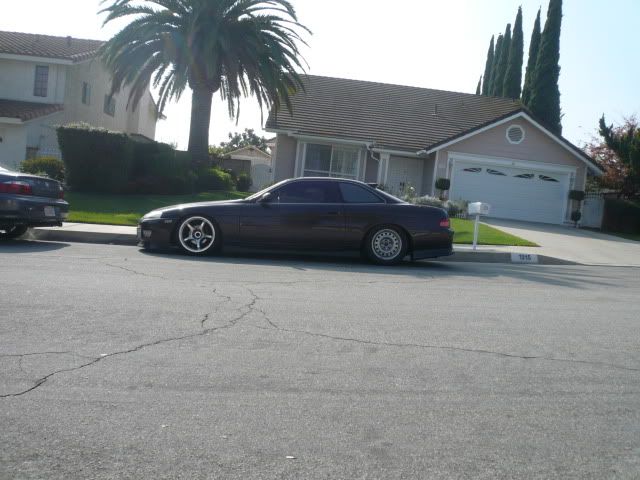
Pic from a year or so ago when I discovered the clunking I'll most likely be laying low until my first track day with the car, as this month's cc bill scared the bejesus out of me. Until next time.
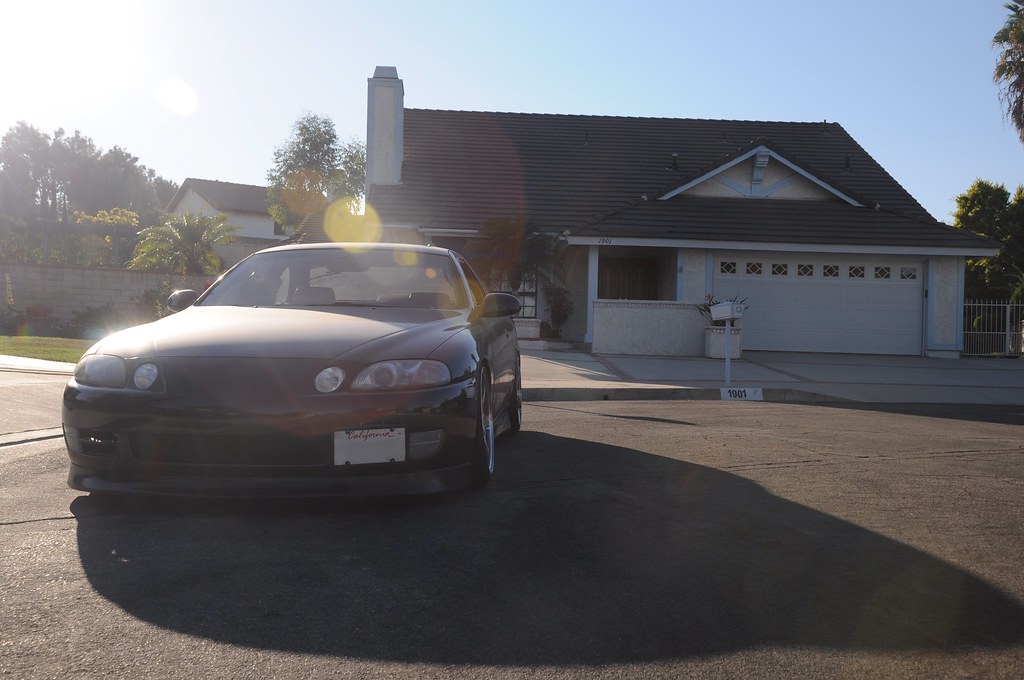
Got a new daily. It's my SC.
tC is in the garage b/c it doesn't go into gear, my motivation for working on a scion is low, and so the sc has taken over the daily duties for the last month or 2.
So, progress on the SC is pretty slow as I need it running to get around. Only things I've done is re-lubed the swaybar bushings with super sticky prothane grease which I got a whole tube of.
Doesn't mean I can't dream, and to fulfill said dreams, I've ordered a mishimoto rad, plan to have PBM weld my diff in a little over a week, and have picked up drift spares that I need to get tires for.
Bye-bye diff plans, helllooooo Works. Still a ton more time and currency needed.
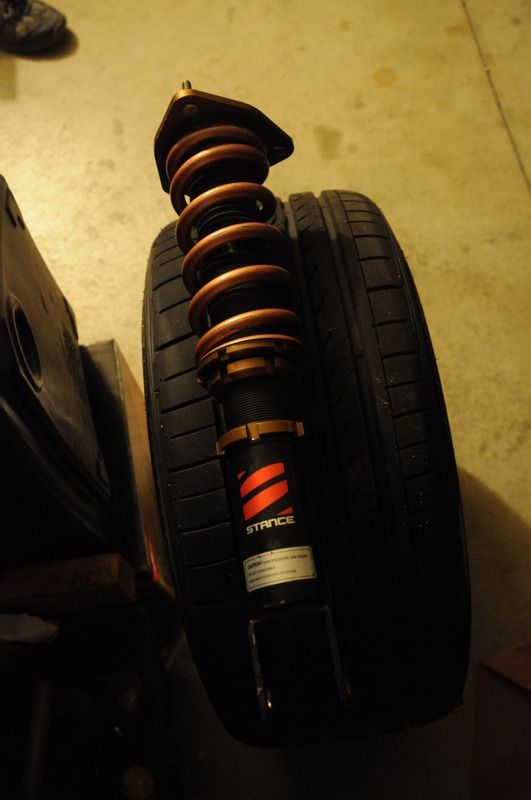
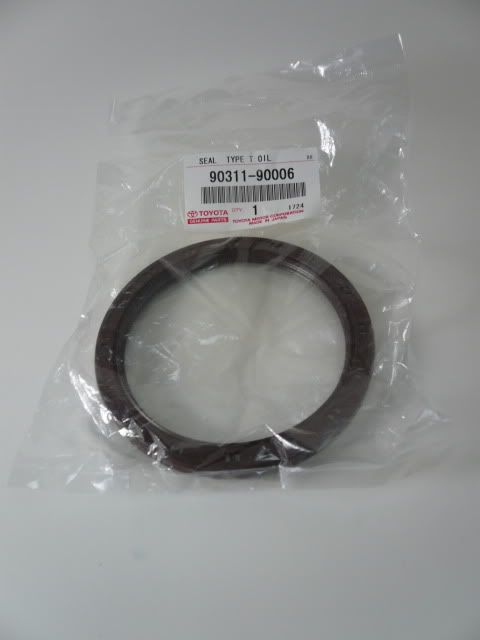
Wow, been a while. SC is back up and running with a brand new ACT XT-SS (Xtreme pressure plate + Street/Strip disc) and rear main seal. Rear supension is done for now with 12kg (same spring rates stock Stance) Swift springs. Took about 4 months for me to put stuff all back together and figure out why in hell my car wouldn't even crank (I was feeling super un-motivated for a long while). I finally went through my fuses/wiring and ended up replacing about 4 fuses and re-doing some of the wiring under the dash.
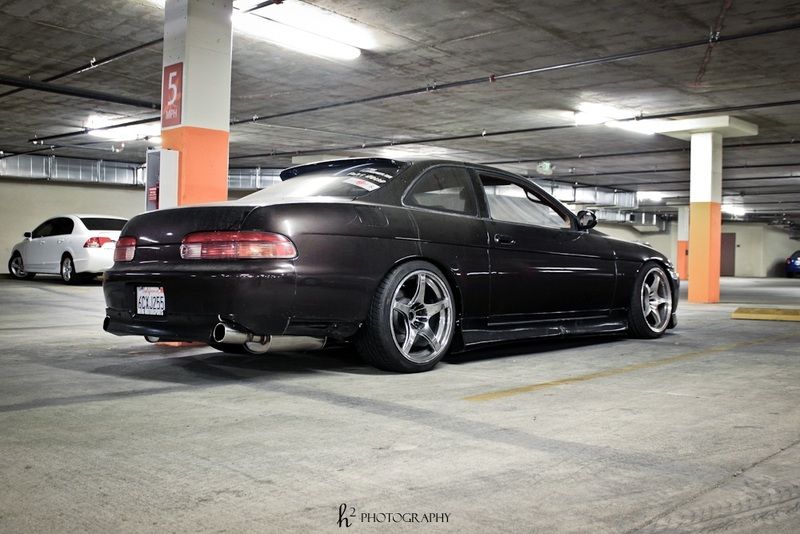
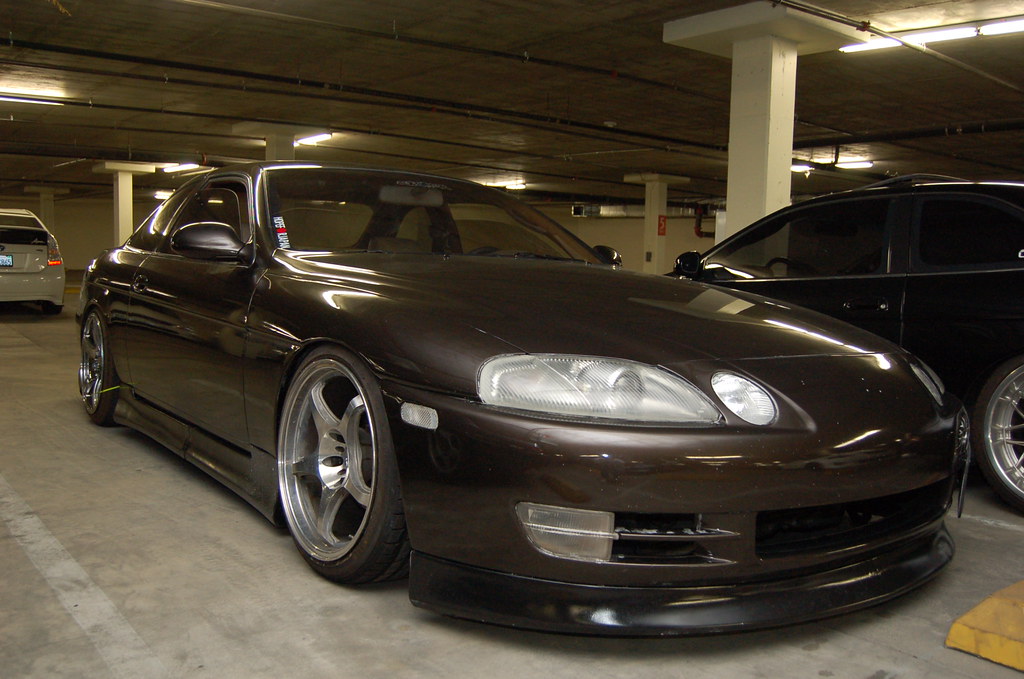
In the end, the car finally started and i ended up raising it 1.5 inches. The increase in suspension travel has not only kept cops off my butt for "being too low", but has also made me feel like the car was a fun car to drive again. Looks a bit less gangster but I actually enjoy the car way more now than ever, and at this point, that's all that matters. Credits to Henry who seem to have made good use of the shitty lighting in the parking lot.
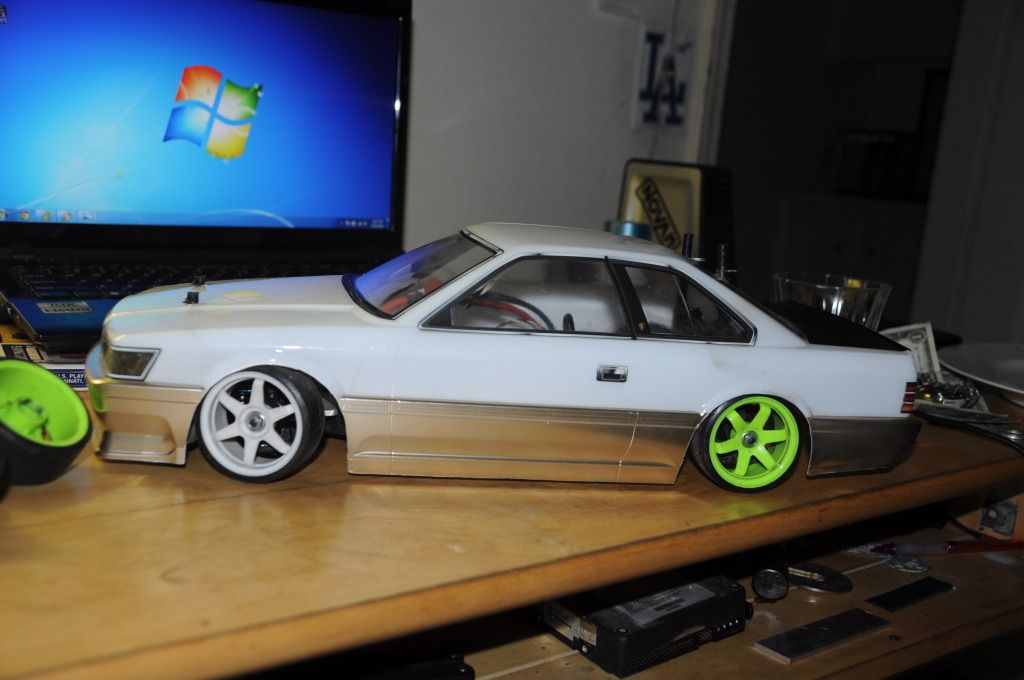
Only plans now for this bucket is a diff and a helmet. In the meantime, I've kept busy with this 1/10 bucket still My latest and probably last body, Nissan Leopard/Infiniti M30.
Back to the SC. I've been stockpiling parts for a while now, and have accumulated quite a collection.
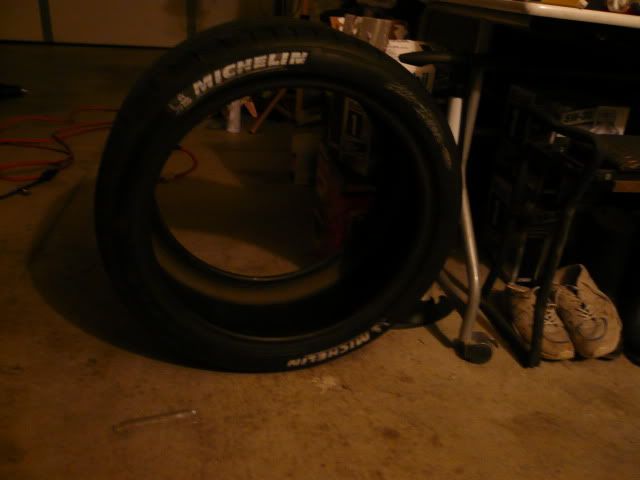
First one was a really old but really cheap tire that I picked up to replace the blowed up 255/35/18 falken, a 255/35/18 michelin that I went to town on w/ the white tire lettering crayon just for shits nd giggles. Found a couple nails in it so I may have to just get another 255/35.
Then, a friend of mine had bought a set of 17x9+17 Buddy Club P1's, a surprisingly agressive spec for buddy club wheels. A bit too aggressive for my friend's sw20 mr2's fronts, so he decided to sell me a pair for $300. I quickly agreed and picked them up. 18 lbs for a 17x9 isn't too shabby. Got some cheap 215/45/17 on them as I won't be driving the sc around on these too much.
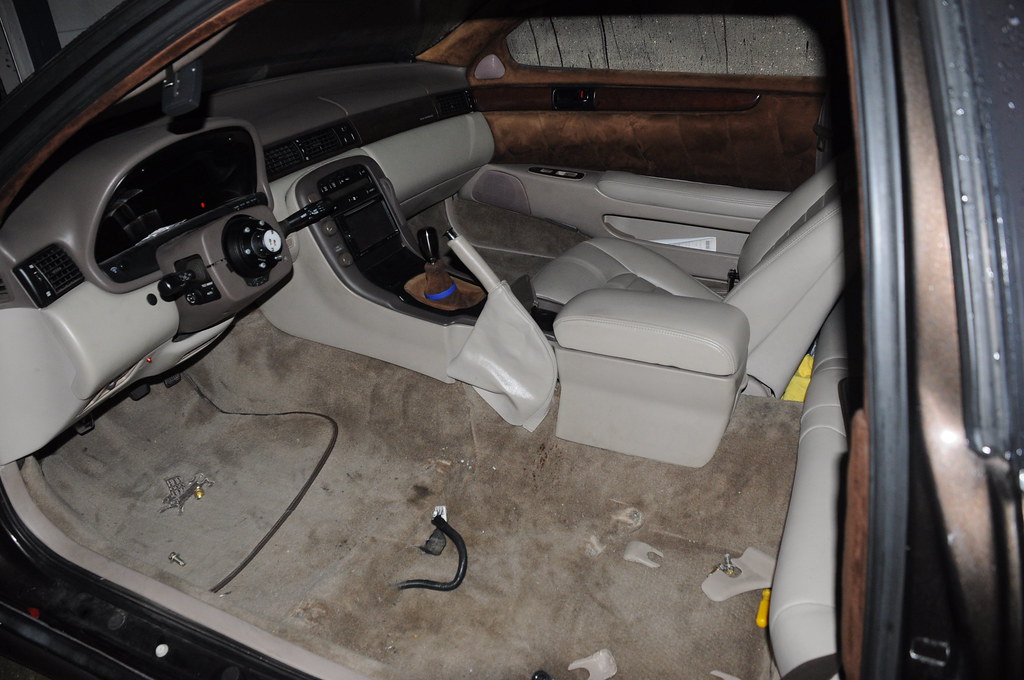
Then, I started preparing myself for when the sc goes up on stands. My plan is to give my sc a whole drivetrain overhaul, in addition to the rack rebuild that I'll have to do. After all this, I should have a perfectly running sc with no oil dripping out of anything.
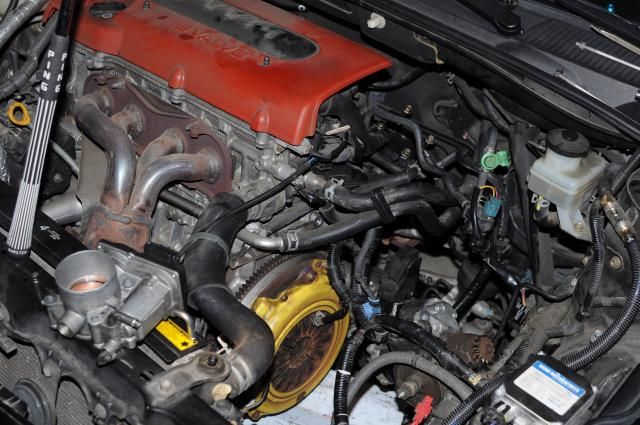
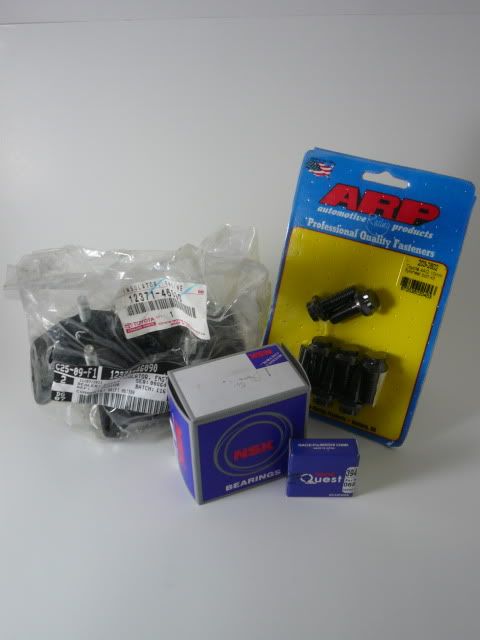
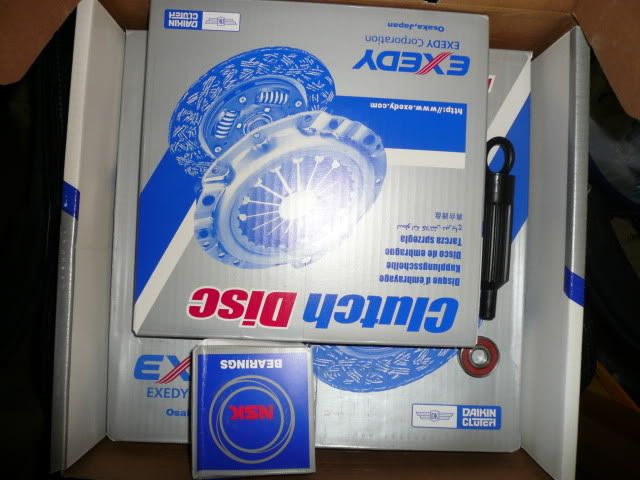
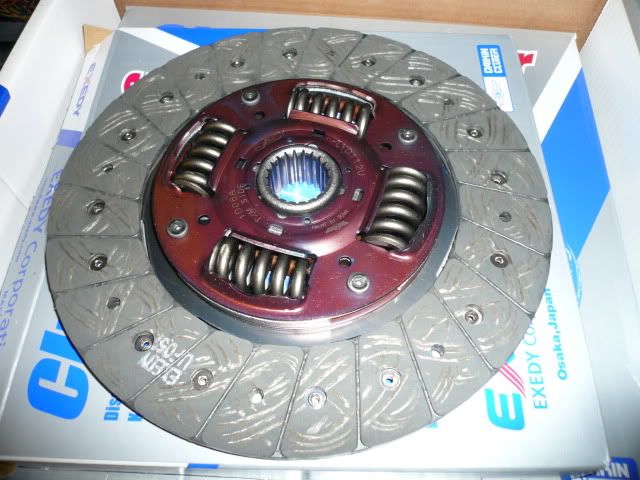
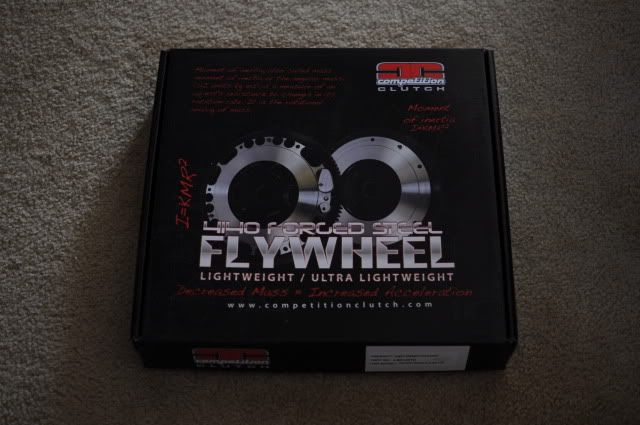
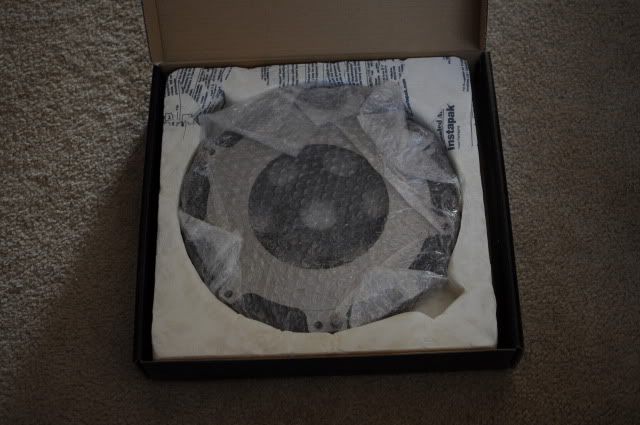
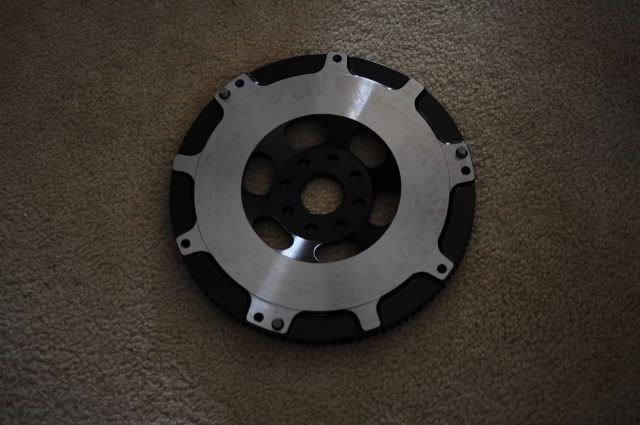
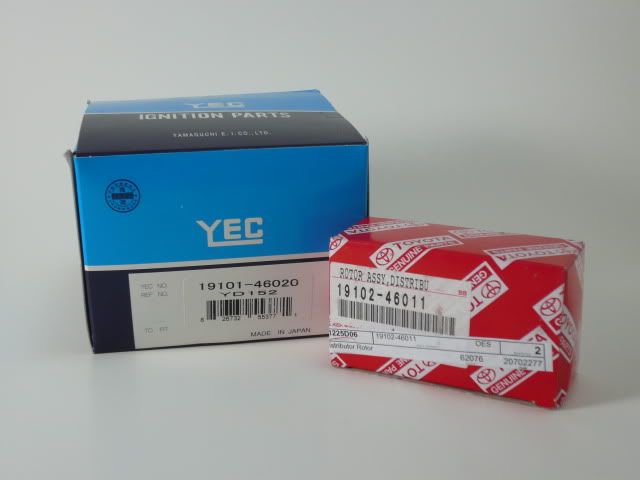
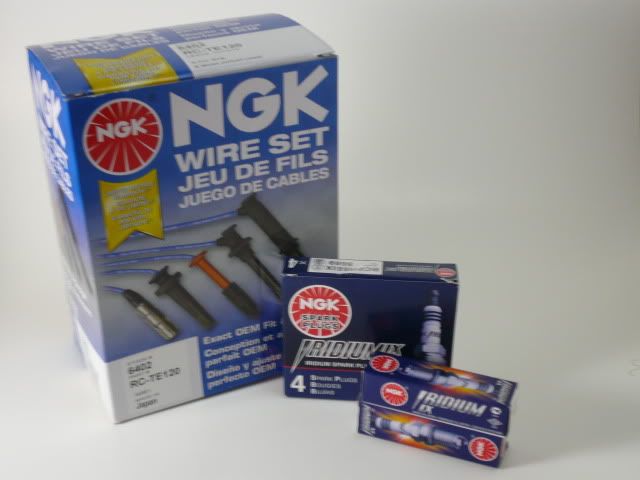
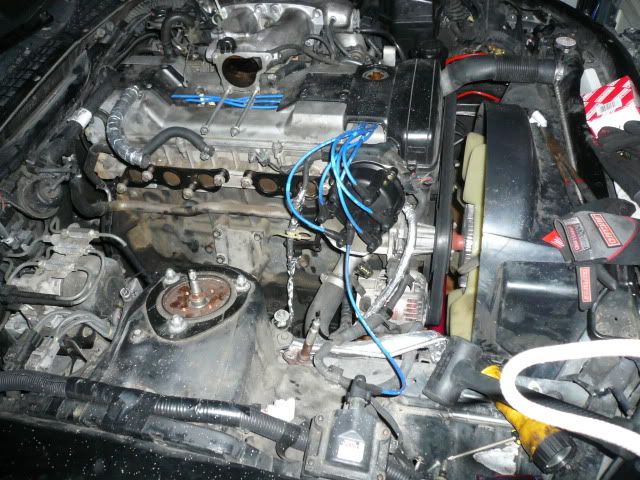
First up, rear main seal. ARP flywheel bolts, W58 tranny mount, pilot bearing, and clutch release bearing. Found out later that I could have just saved my money and not bought the bearings. Why I could have saved money on the bearings? Because they came with the clutch kit. Exedy oem replacement (not really pushing any more power than stock) and a lightened Comp Clutch flywheel which weighed in at 11lbs. Seeing as I've taken my whole intake system apart to do a thorough cleaning of the insides but never touched the ignition system, I decided it wouldn't hurt to do a complete refreshing. Also, at my last smog check, everything was well under the passing limit, except for hydrocarbons which leads me to suspect that the sparks aren't as strong as they could be.
Distributor rotor/cap
Wires and plugs
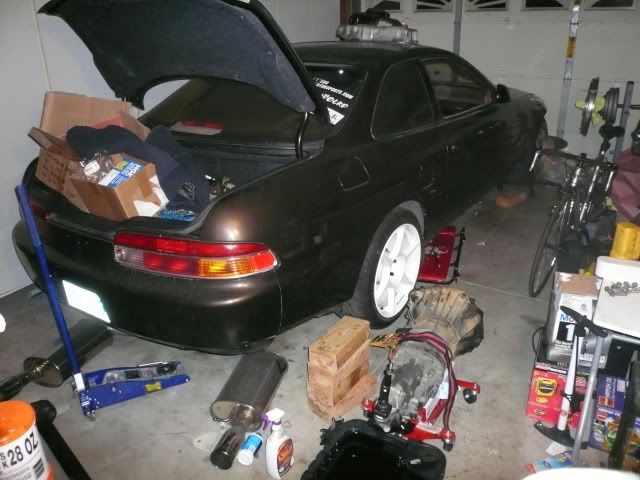
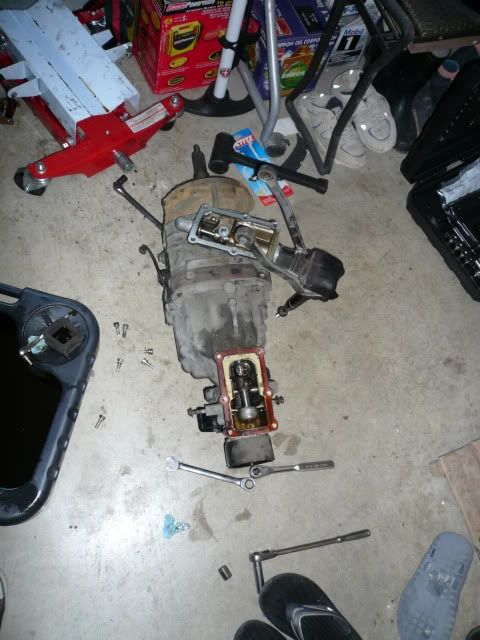
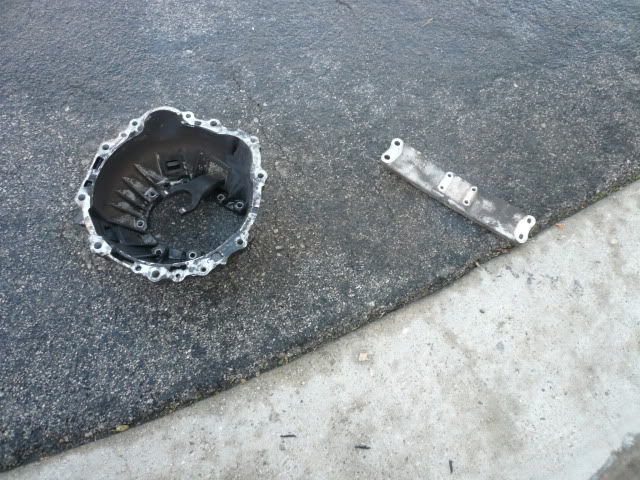
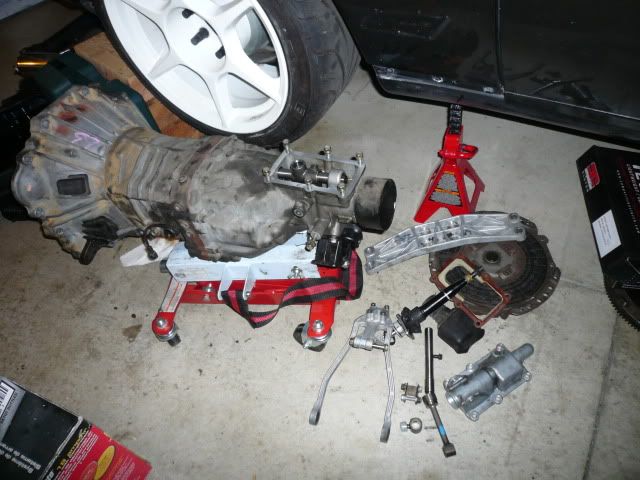
Waiting for parts to roll in was boring, so I went out, bought some plexiglass, and made some clear corners After waiting for all the parts to roll in, I jacked up the car and got to work. After a couple hours of preparation to drop the tranny (removing exhaust system, driveshaft, etc etc), we were able to unbolt the bellhousing from the block, pry the 2 apart, and get the transmission down on the floor. Took off the bellhousing and tranny mount plate to clean out and the shifter extension to change out the plastic cup thingy, and just to see how the tranny works, as I've never seen a FR tranny that doesn't have the shifter going right into the transmission, rather, using linkages in combination with an extension to shift.
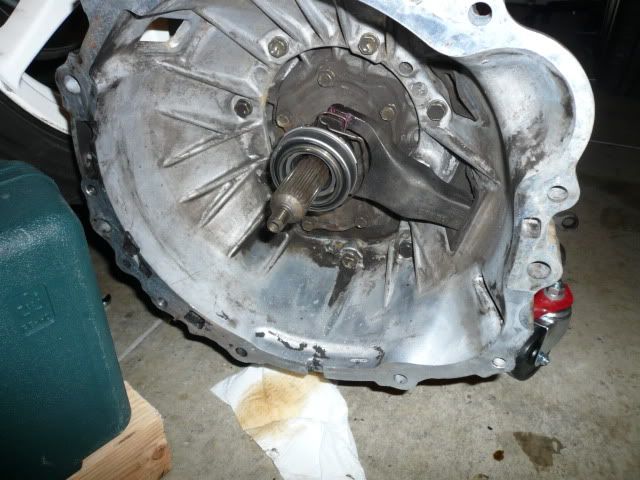
After several rounds of industrial cleaner, the bellhousing finally looked acceptable
Then, I turned my attention back to the motor to replace the clutch, flywheel, rms, and pilot bearing. After hours of trying different methods to get the pilot bearing out, I rented a slide hammer from o'reilly's and the bearing was out in a matter of seconds. The rms was then replaced, followed by 20 minutes of scrubbing.
At this point, I turned back to the transmission as I had realized that a pair of the extension portion's bushings had been worn down. Doing a bit of research, I found aluminum bushings made by APE, and although the price was high, the though of having precise shifts pushed me over the fence and I ordered them. The extension portion stayed blown apart as I waited for the bushings to come in.
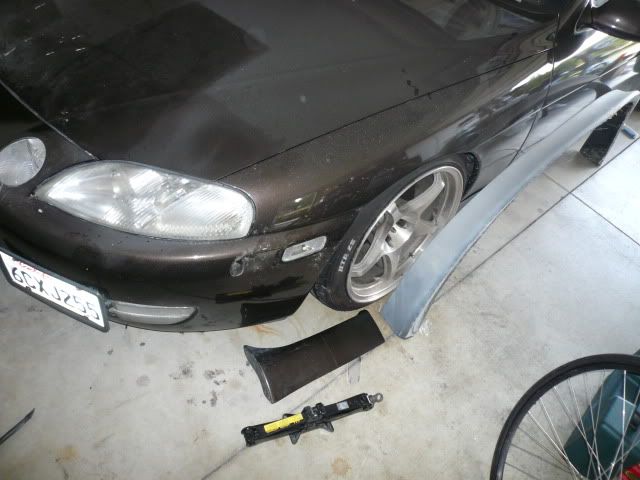
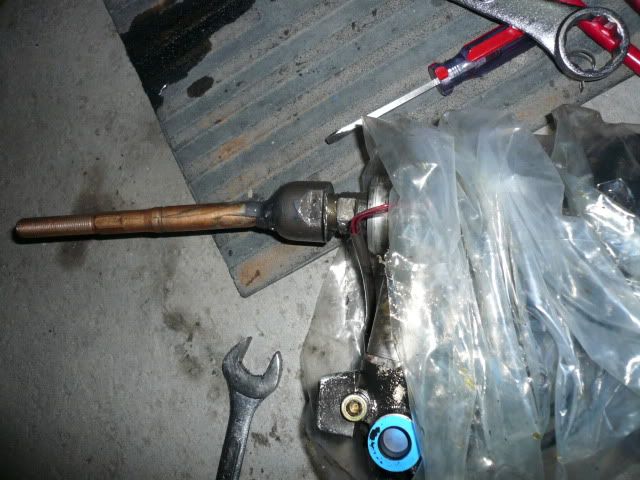
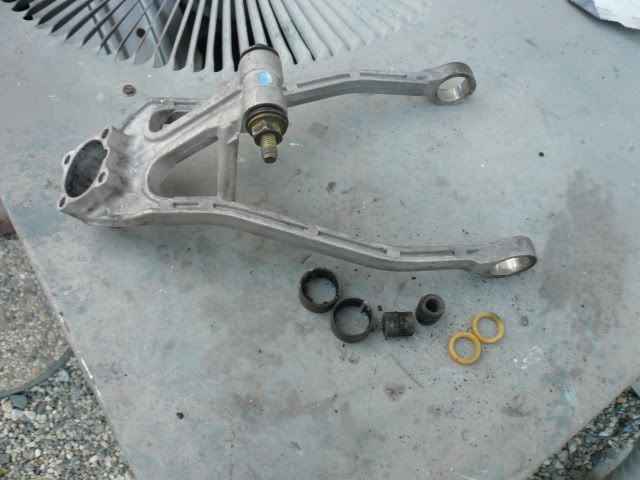
During the wait, I moved up to the front of the car to resolve another major leaking issue, the rack. The rack's seals had apparently been worn, as ps fluid would randomly torrent out of the boots. After undergoing one of the messiest processes I've ever been through, the rack came out with ps fluid dripping out of everything. Took it to ABC axles and got a rebuilt rack in exchange for $100. Took the new rack home excited that it wasn't drenching me with atf fluid anymore, and took apart the inner tie rod to install some tie rod spacers for a tiny bit more angle.
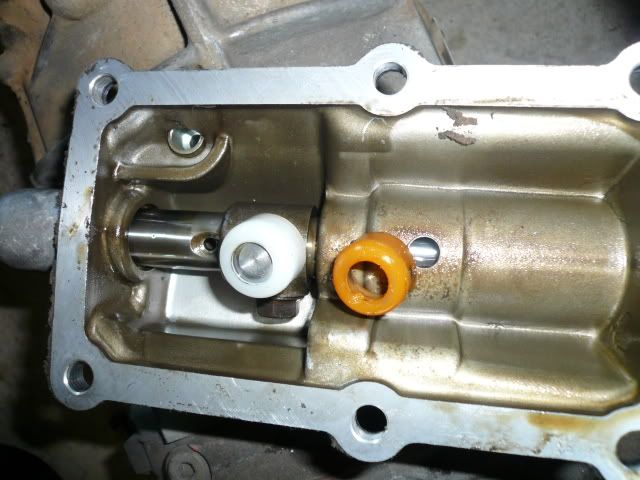
Right as I finished the rack work, fedex dropped off my ape bushings and threw them in the freezer. Took them out the next day, greased them up some, and pounded them in
Before with the old bushings burnt out
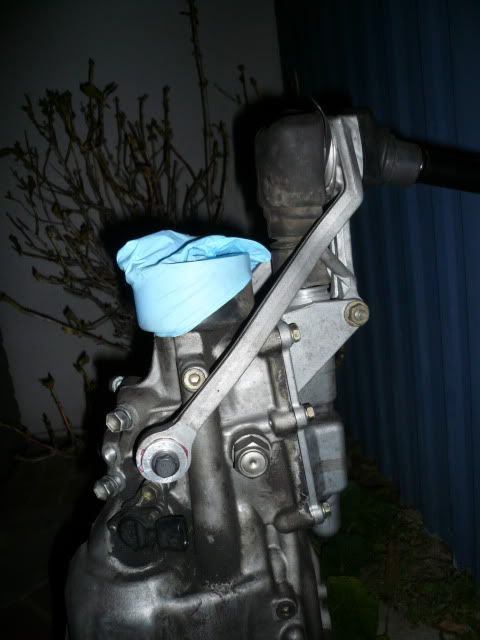
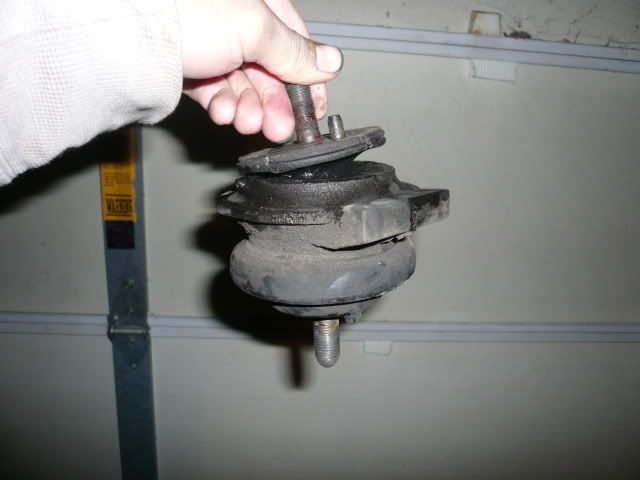
After with new bushings A friend of mine came over one day to help with the various things going on w/ the sc, and decided we should start the ignition, so we got to it, and even tackled the motor mounts, though we learned that it would've been 100x easier with the tranny bolted to the motor.
With new plugs, wires, distro cap/rotor Aaaaaand the old motor mount that was fortunately changed out with something that wasn't so beat to hell I then decided one night that I was going to tackle the reinstallation of the transmission, and with some sort of strike of luck, the splines matched up and the bellhousing was somewhat bolted onto the motor after an hour of jacking the front of the motor up to lean it back a bit, checking clearance, raising the tranny a bit, checking clearance, raising tranny, etc etc.
Put everything back together and got the car on the ground, got it aligned, and drove it down to sd. Too bad my clutch started slipping on my way back home, and found out a couple days later, that I had started to leak oil yet again.
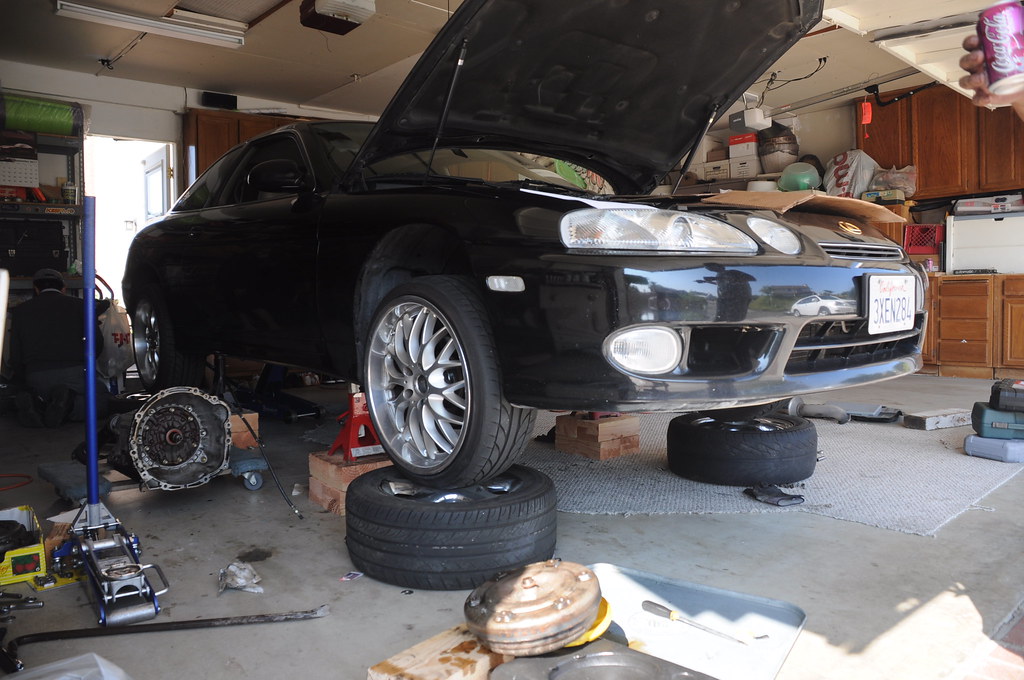
Unfortunately, amongst all the stuff I did with the SC, I decided to finally put in some work on the tC that were long overdue, so I had to shell out the cash and garage space to get my tC back up to dd condition.
Meanwhile my sc became the dd to get me to/from work. Solid bushings and 18kg/12kg springs do not work comfortably with LA roads. Nevertheless, it got me around town until the Falken blew up, so my tC stayed in the garage for close to a month while I got all the isht it needed. Though the sc was reliable in that it functioned normally, it slowly started deteriorating over this time, with exhaust leaks, more fluids leaking, the tire, etc.
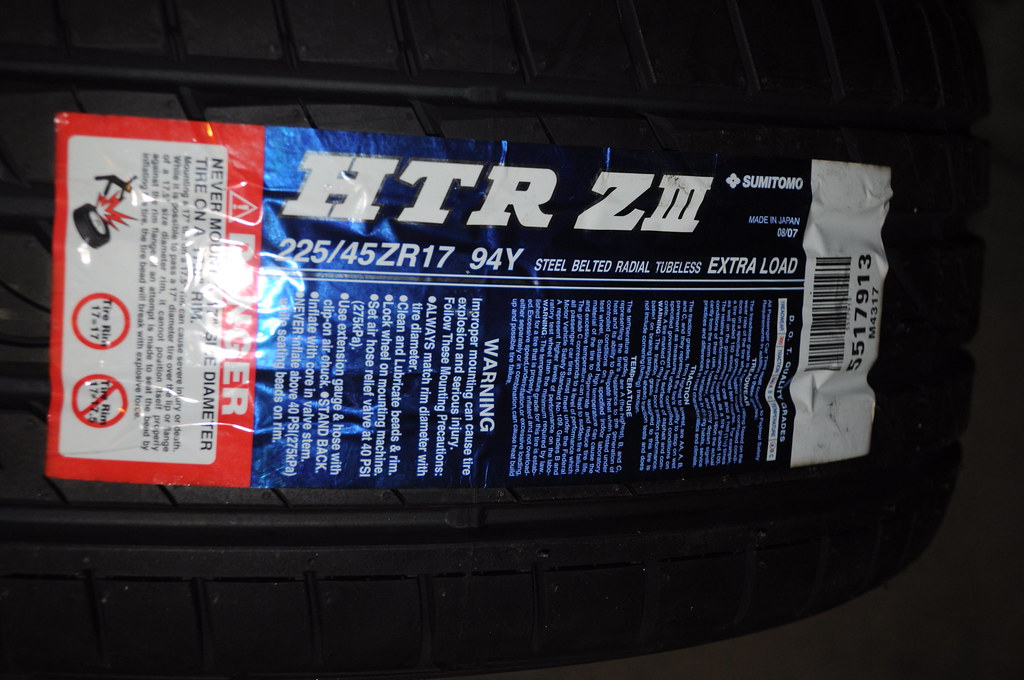
First up on the list of tC to-do’s was to replace all 4 tires. I had been on my old sumitomo htrz-II's for the past 5 years, with about 60k on them. They were finally starting to look like slicks and I’ve recently been noticing that it had been getting easier and easier to pop super awesome fwd burnouts when I became just a bit sloppy w/ the act clutch. Not a bad lifespan for $80 summer tires, though. So, I borrowed a pair of jack stands from a friend, jacked up all 4 corners, and ordered the updated versions of the htrz-II’s, the htrz-III’s, which apparently have even more grip, less noise, though, apparently wear out quicker.
_ Next up was the battery had never been replaced, so now after 6 years of ownership, acid was seeping out of the negative terminal, treating me to a nice big delicious looking snowcone in my engine bay. Even the worker at pep boys felt the need to comment on how much acid was gone from the old battery. So, I replaced the stock panasonic battery with a Bosch battery and also cut off the stock negative terminal connector as it had pretty much been corroded down to sheetmetal and replaced it with some generic looking one.
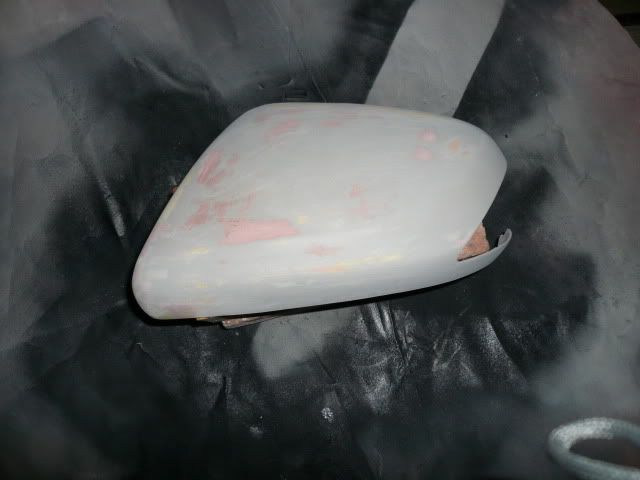
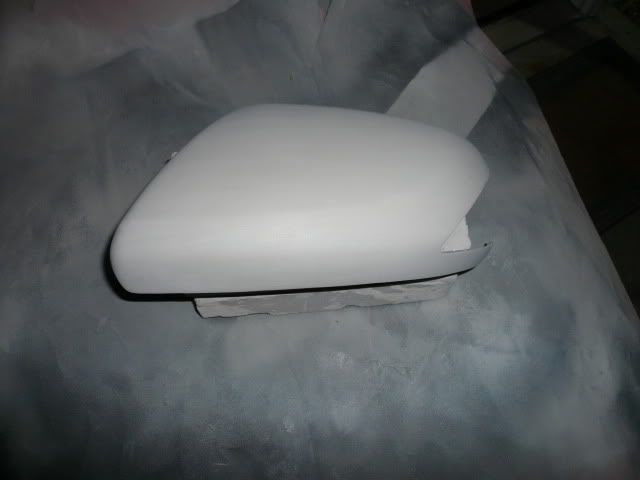
Then, for the past few years, the paint on my side mirror covers had been fading for some reason, seems to be one of the many common problems that tC's have. So, I took them off, broke about 3 clips in the process as usual, and realized the passenger side cover was cracked.... Probably due to one of my attempts to park as closely to the pillars on the side of the parking stalls at work...
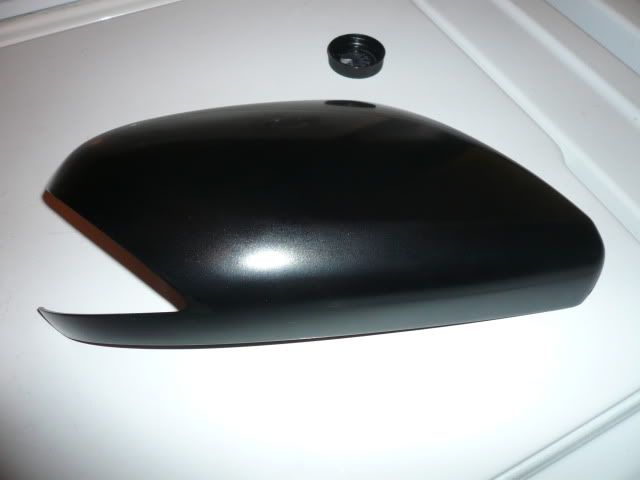
Eh, w/e. So I sanded them down, epoxied the back of the cracked portion, filled in any low spots, laid primer over it, and sprayed some 0209 bsp that I got from automotivetouchup.com. Even came in an aerosol can, pretty cool.
I had a bit more 209 left after both sides were done, so I decided to kill the can off on my lip spoiler that I had been laggin on getting repainted (i banged it up a bit during storage) and installed. Finally got around to it.
Also ended up replacing my axles which had developed a pretty ridiculous amount of play.
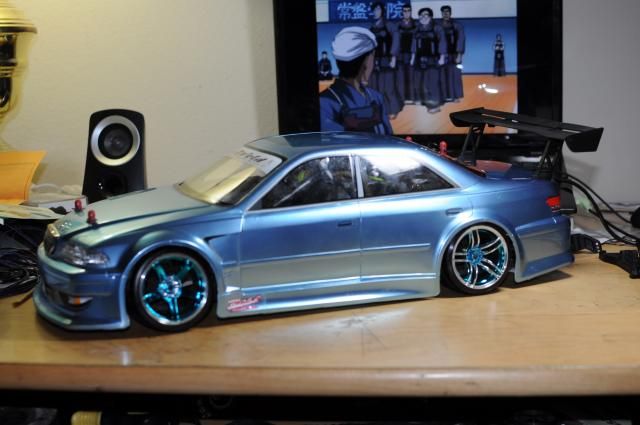
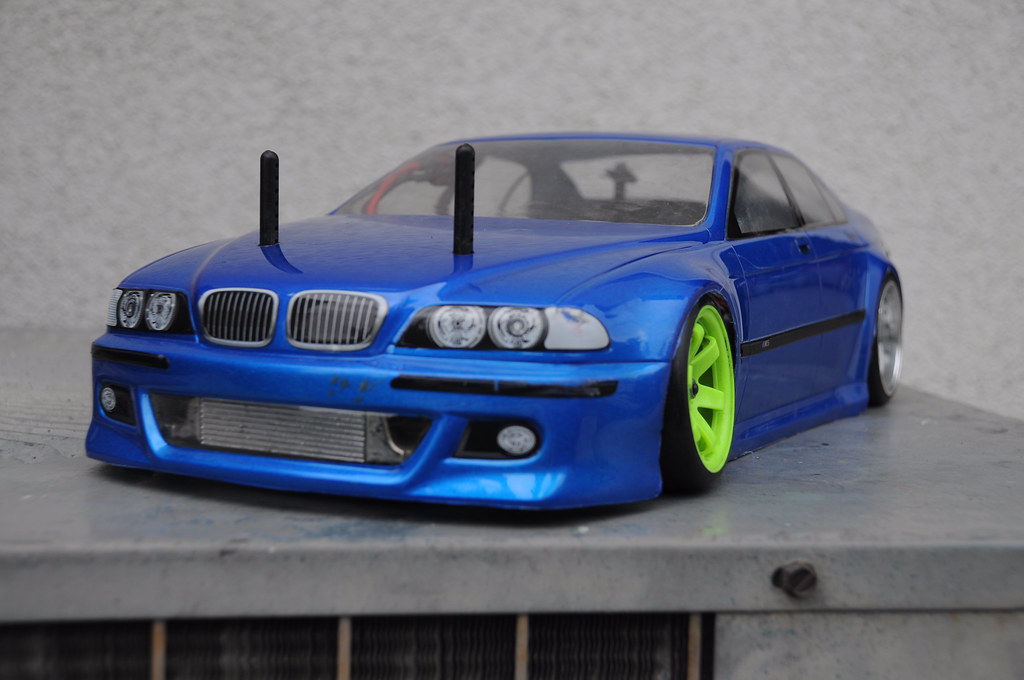
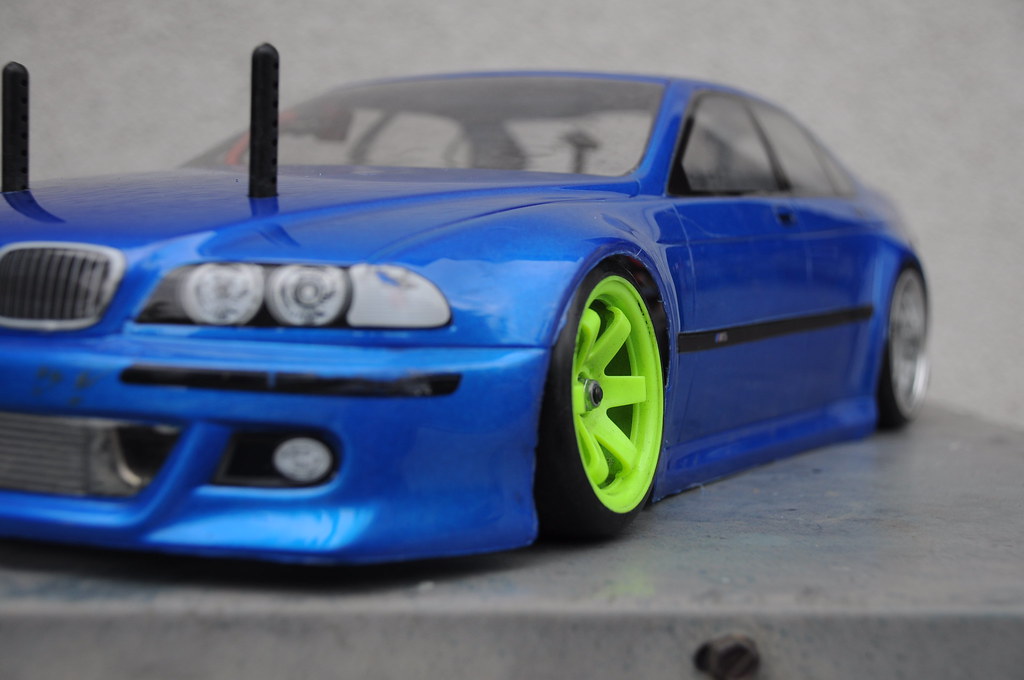
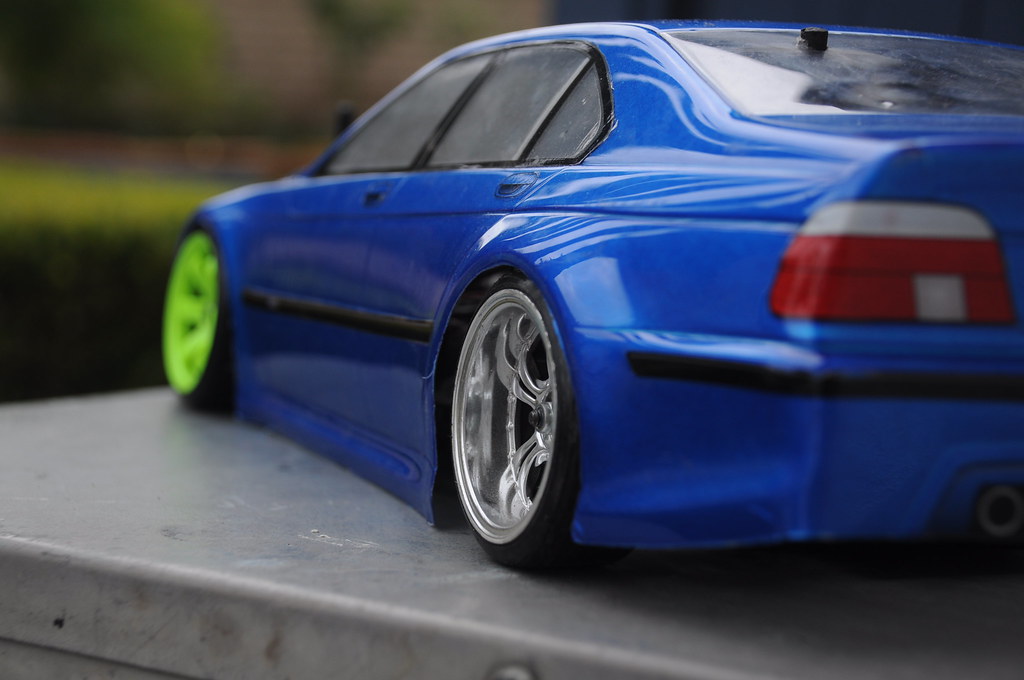
During the midst of all this, I started getting bored with real cars, so I started working a bit on the r/c.
I got a new body, painted it blue and backed it with silver. Came out pretty good, considering it was my first time using semi-transparent paint.
Then, I rebuilt my shocks, added softer springs and sway bars, and cut a bit out of the steering system to allow it to turn a bit more.
My suspension/interior stage has pretty much finished, next up will probably be transmission and engine. My wish list atm is a Kaaz 1.5 or 2-way LSD, a new Exedy stock replacement clutch and a lighter flywheel. But before that, I’d probably do a few steering mods, as my rack needs a rebuild anyway with atf randomly driping out of the tie rod boots. So in the upcoming months, I’ll probably get a rebuilt rack, steering spacers, and even maybe a shortened knuckle for more steering angle.
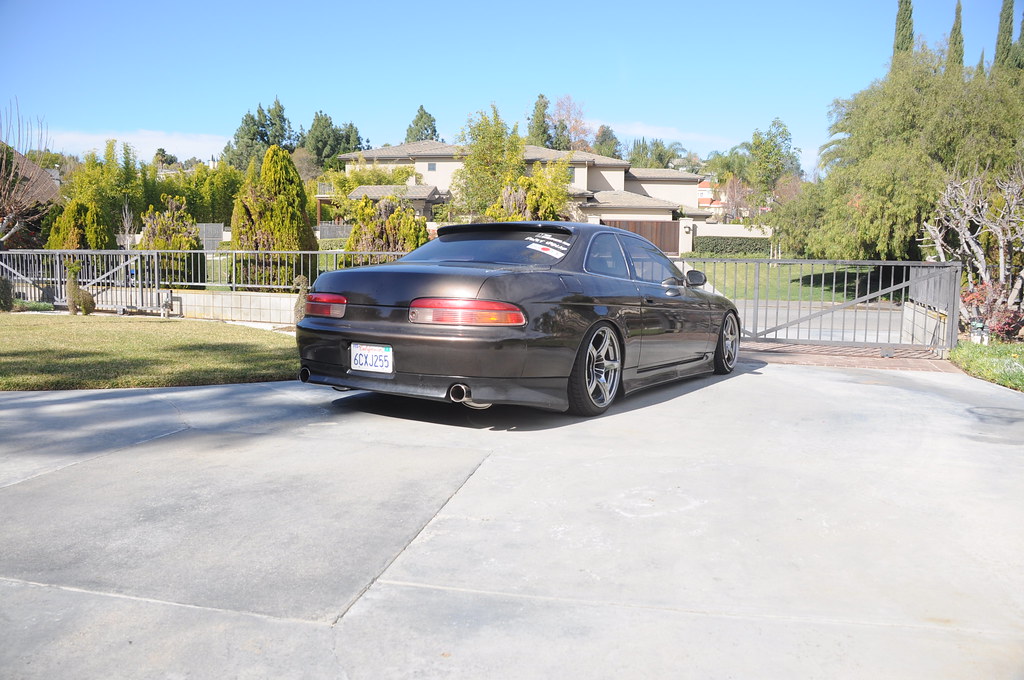
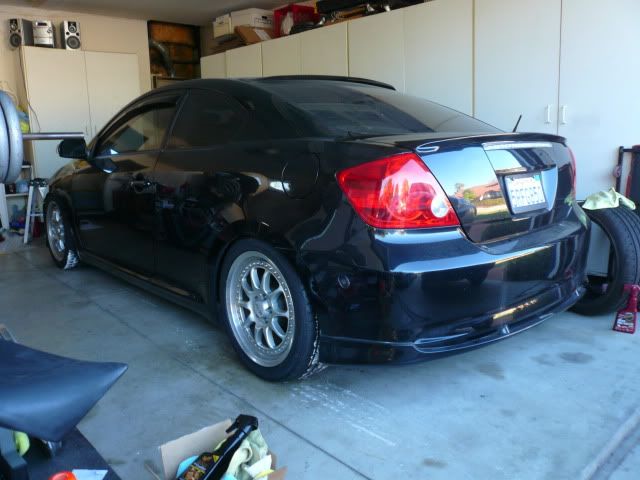
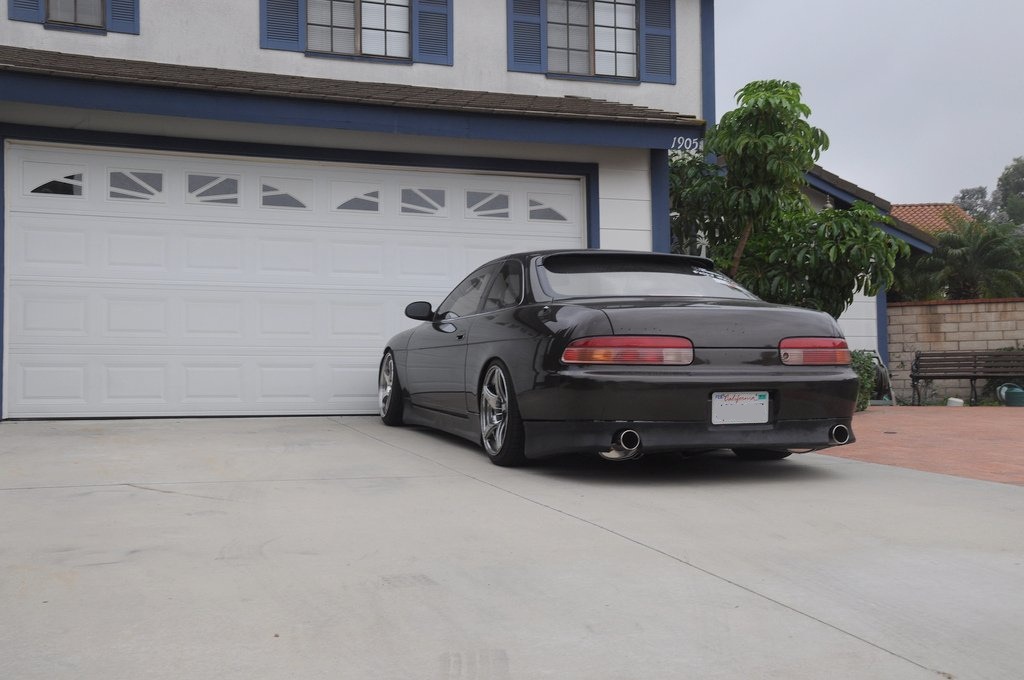
For the moment, though, the sc sat like:
Credit to whoever shot this picture at one of the local meets.
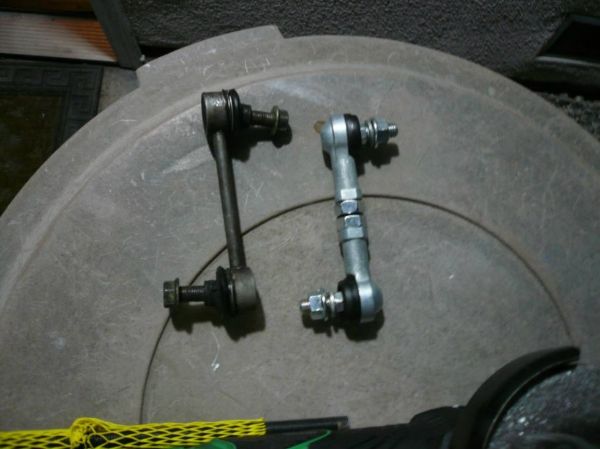
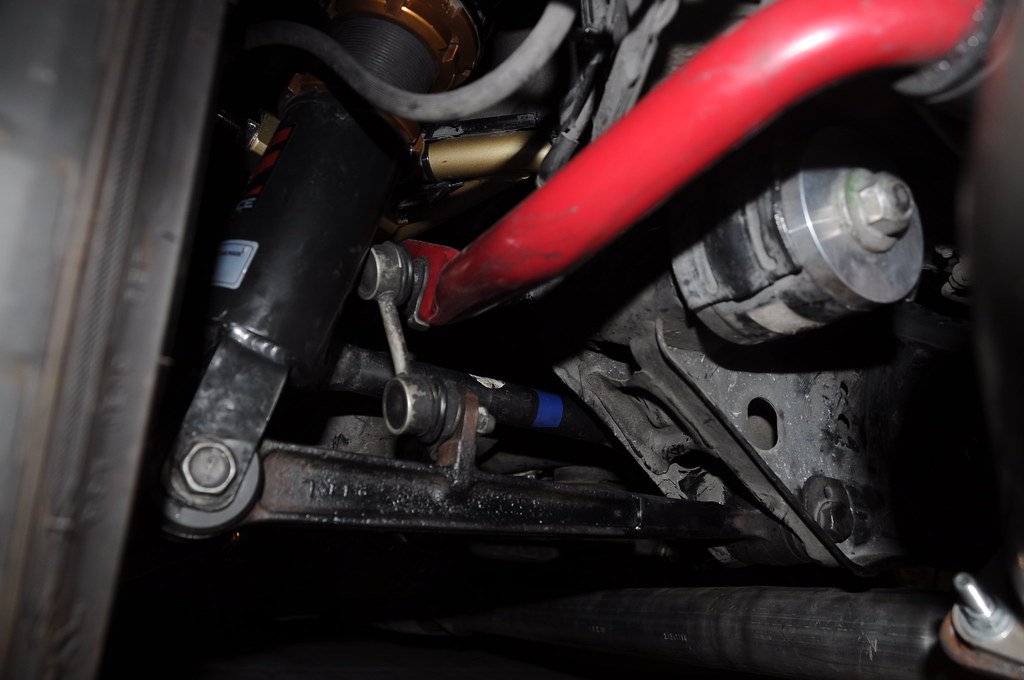
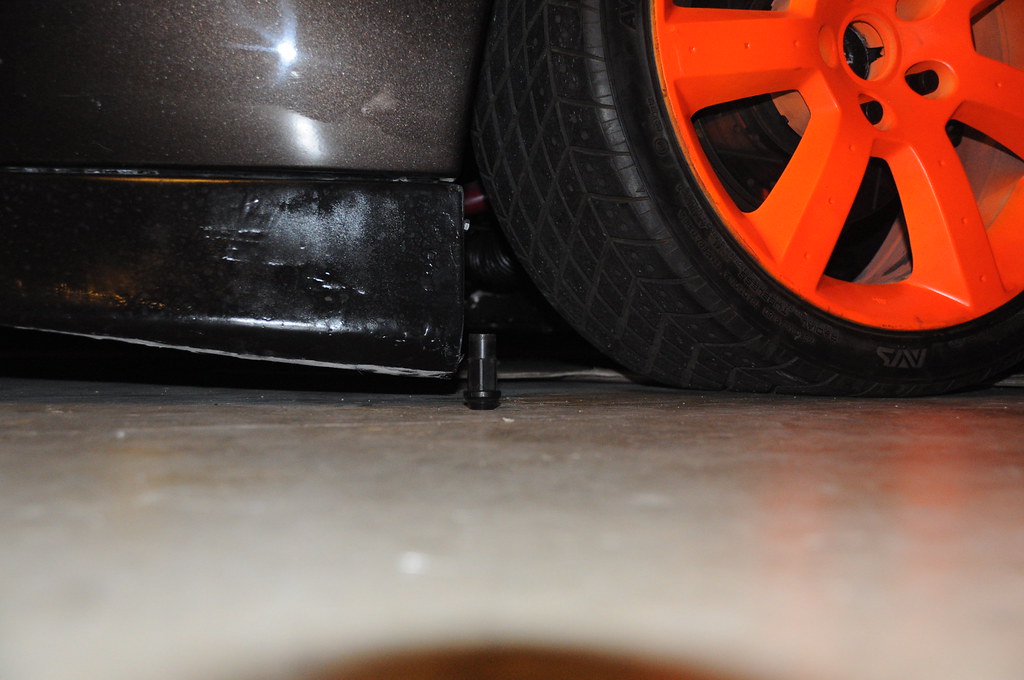
One of the issues I had wanted to address was my rear swaybar endlink. Because of the shortened lca, the endlink was now at an epic angle and in a situation where it was just waiting for the balljoints to explode or for the shaft to bend.
So, I finally scrounged up the energy to get off my ass, pause my drift tengoku video, and head to lowe's to buy bolts, nuts, washers, spacers, etc to go with the heim rod ends that I had ordered a couple weeks ago from mcmaster.
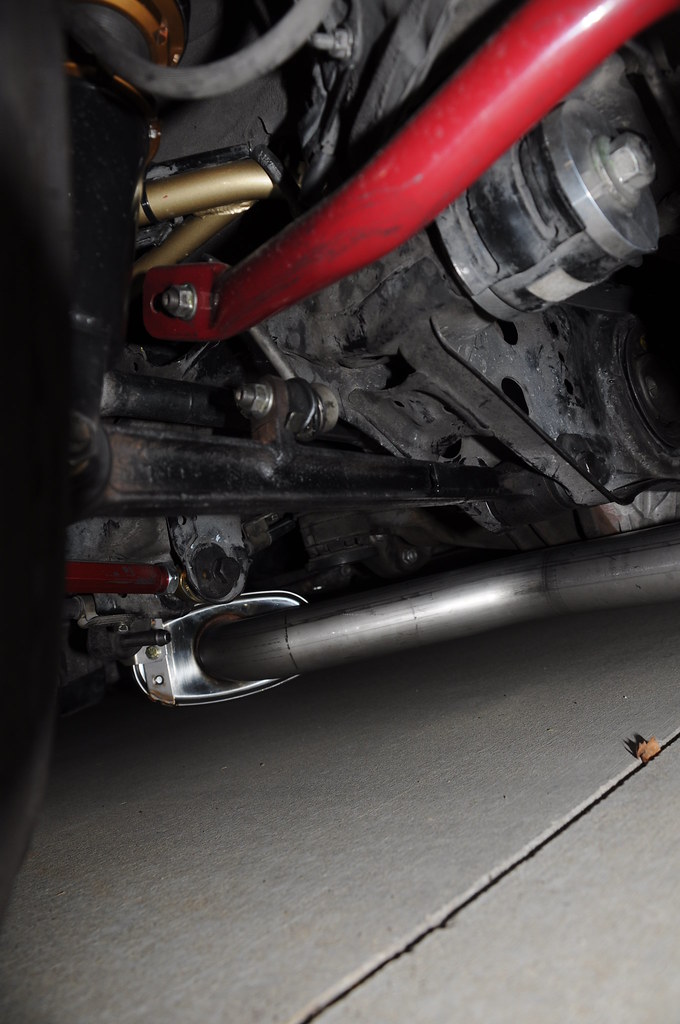
Went from:
(because the top of the endlink was rubbing on the coilover)
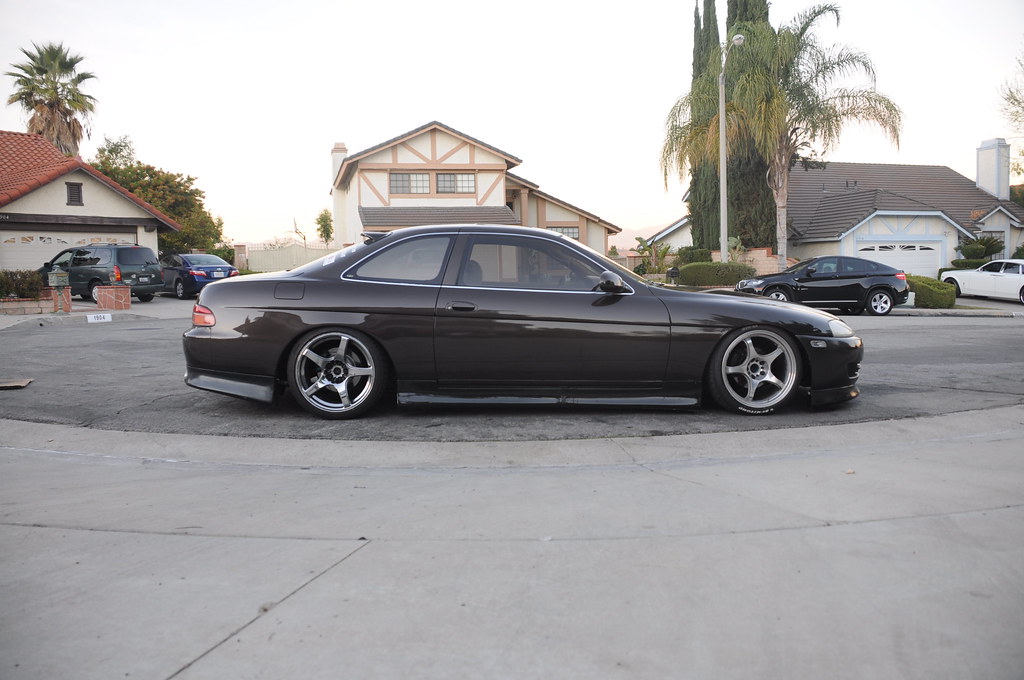
to then finally to: Another thing that had been bothering me about my car was my rear stretch. The 18x10+22 in back are far from illest,bro fitment, so the 225/40 stretched onto them looked 1. out of place and 2. ridiculous.
So, I picked up a pair of new-ish 255/35/18 fk452s (not my fave, but they’ll do) for $200 off zilvia. The beads turned out to be damaged, but thankfully, a friend at Pep Boys was able to get the beads to completely seal and all was good.
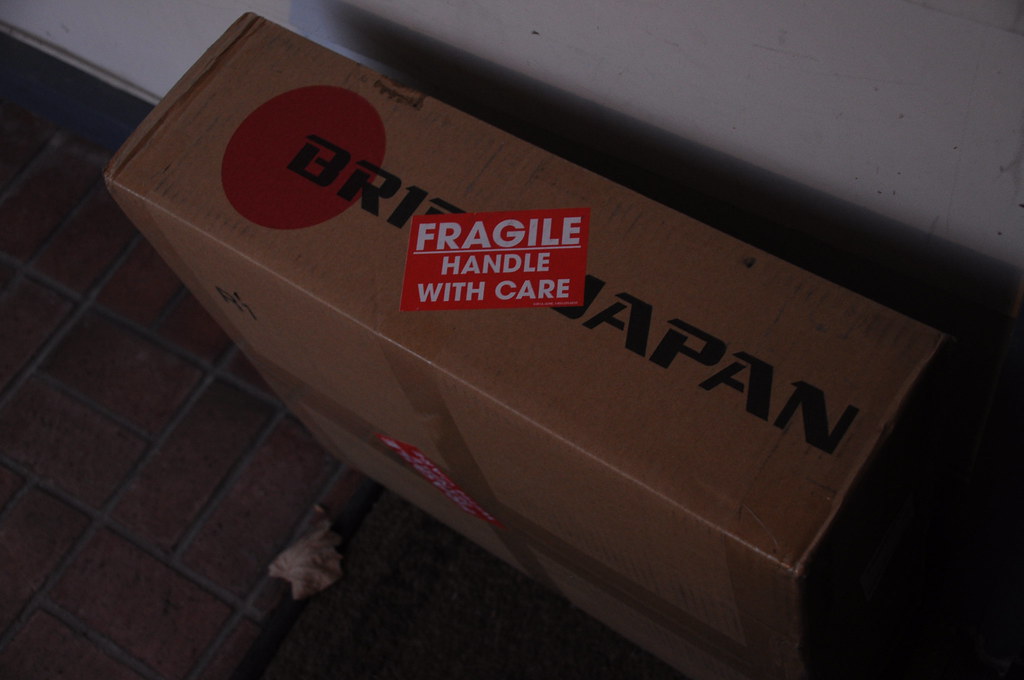
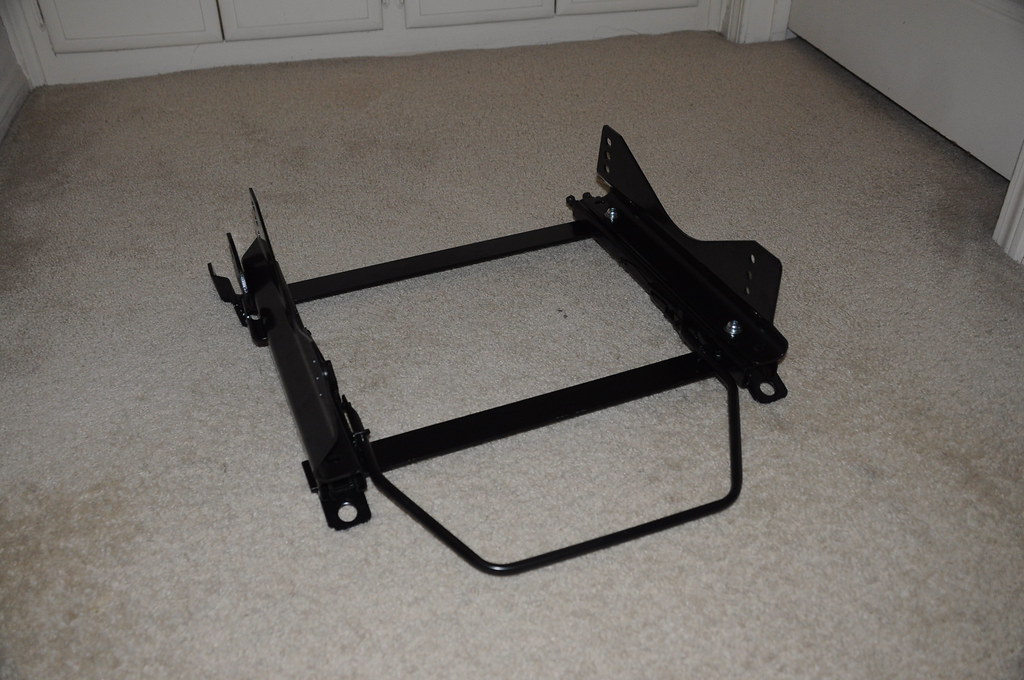
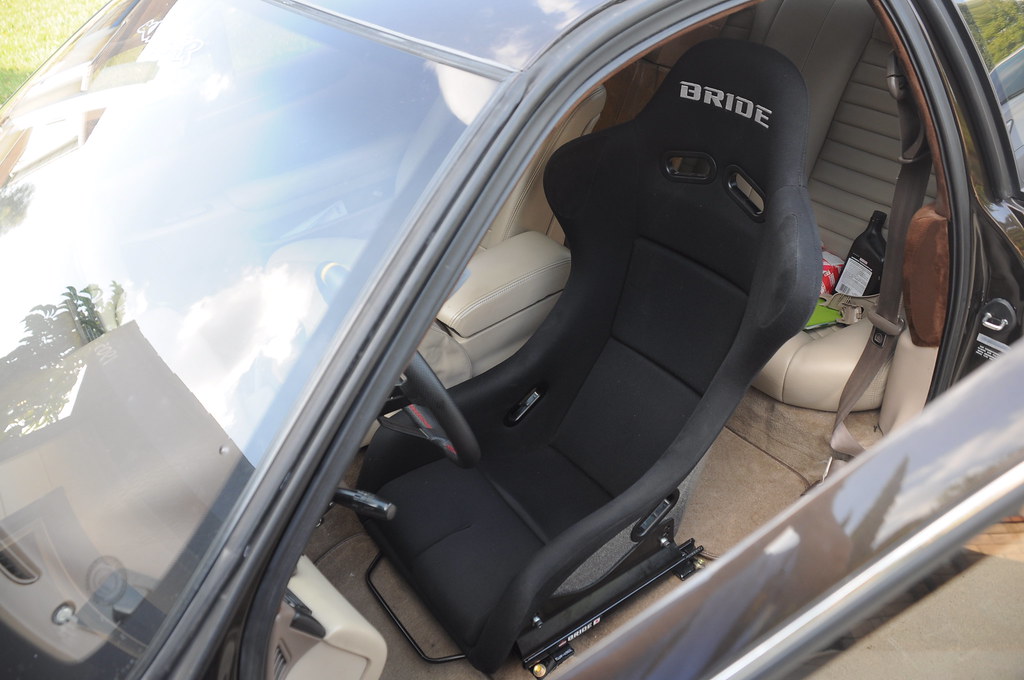
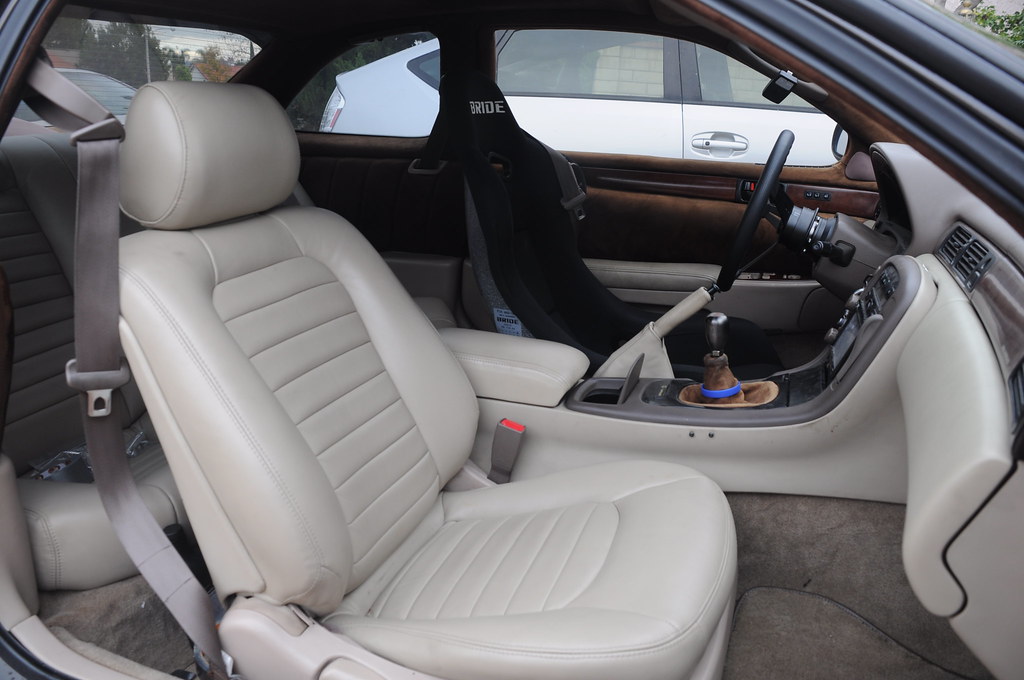
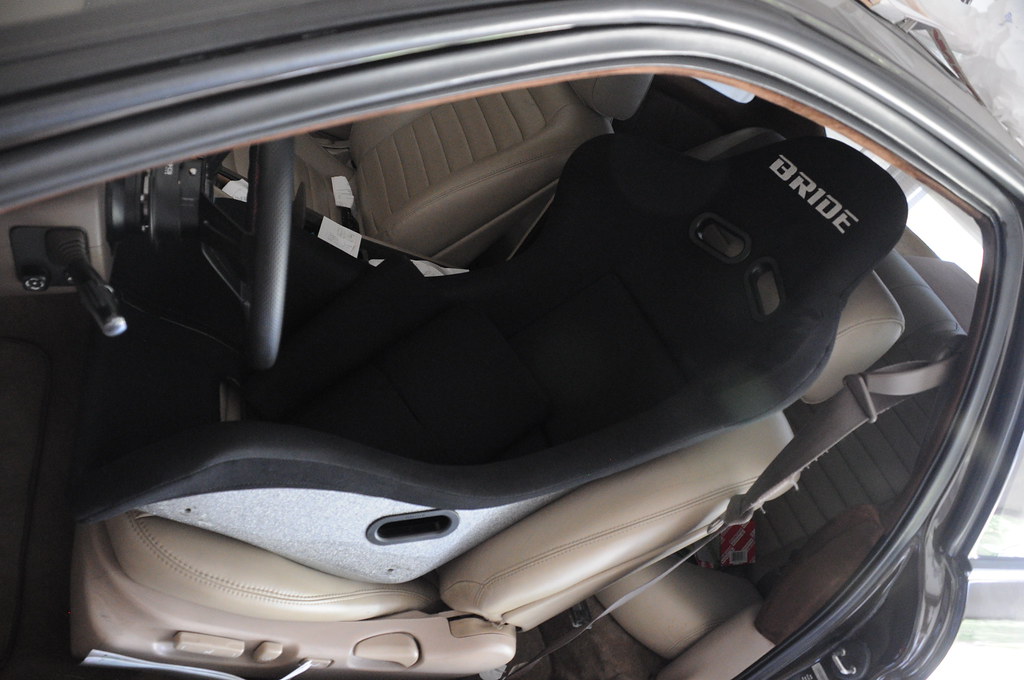
After pounding down the bump that runs inside the wheel well right where the tire would sit, I slapped the wheels on, torqued them down, only to realize that I could've gone wider. Dammit. Then to my surprise, the Friday before the annual VIPFest held at AutoFashion in SD, the Bride seat rails that I had ordered 6 weeks before were awaiting my arrival back home at my doorstep.
Giggling like a little girl, I grabbed it and headed to my room to tear open into the box and start assembling it.
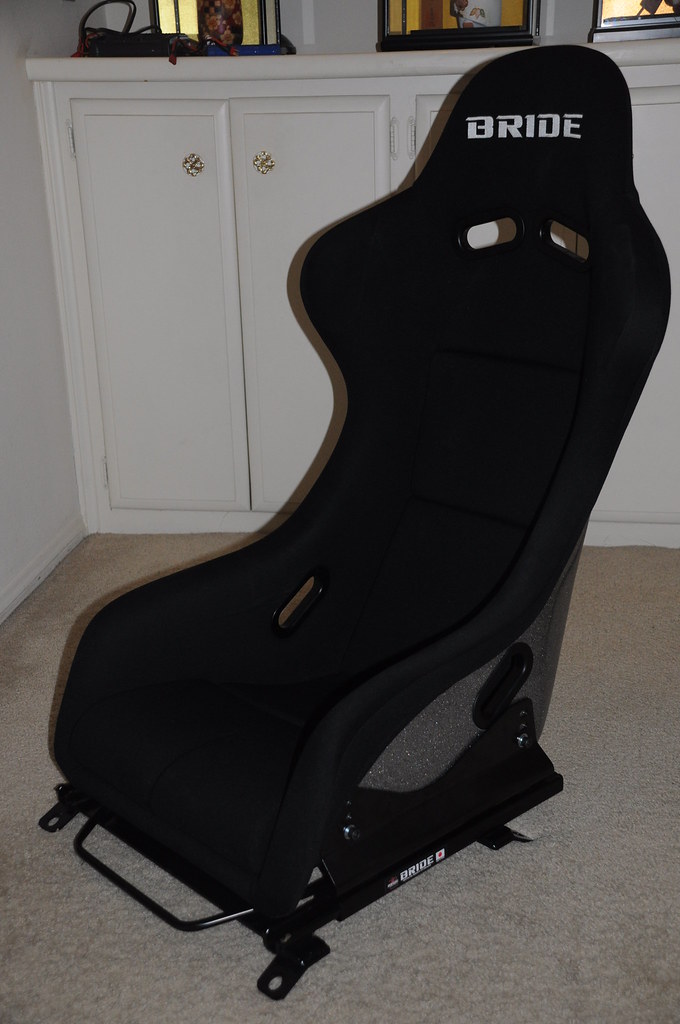
Threw my seat into the equation
Then went back to the car to take off the 5 bolts and 1 plug that held the seat to the floor. The biggest issue I had with this whole process was this step. Though the process was incredibly straight forward, wiggling a seat that I later found out to be 70 lbs out of the car proved to be a huge pita. Thankfully the new seat rail and seat combo came out to just about 30lbs. Once my back got some rest, I went back out and quickly bolted the seat in at the lowest setting.
The lowest setting turned out to be a too low, so I took the seat out and raised it 1" or 1 hole to the middle setting, and all was good. Drove it down to SD, 2 hr long drive each way, and got out at the end of the day with a deteriorated spine and squished hips. Thankfully, this process apparently got my body used to the seat reeally quickly and from the 2nd day on, I felt more comfortable in this seat than any other stock seat.
Unfortunately, the next day after my trip to SD, one of my newly acquired 255 falkens in back decided to go out in an epic fashion on my way home from work, so I'm thinking of saving up for a bit while rollin around on 1 steelie to take this opportunity and go 265 or maybe even 275 in back, just because I can.
Since getting the process of getting the sc up and running was not only just a whole lot of labor, but also an immense amount of waiting for either funds or the availability of a part/service, I had to keep myself entertained somehow.
[pic dump]
older 50/50 drift chassis setup, ta-05 ver.2 new countersteer drift chassis setup, ta-05-ifs, most of which is converted to ta-05 ver.2 parts solely to help part interchangeability between both my chassis. Decided I'd want to get a bit back into shape especially if I want to fit into Helped a friend do a 5spd swap on his sc. Now a '97 5spd sc300 with a legitimate '97 m/t ecu. pretty cool stuff and for the lolz, I'm now re-thinking my tire size choice b/c of...
[/pic dump]
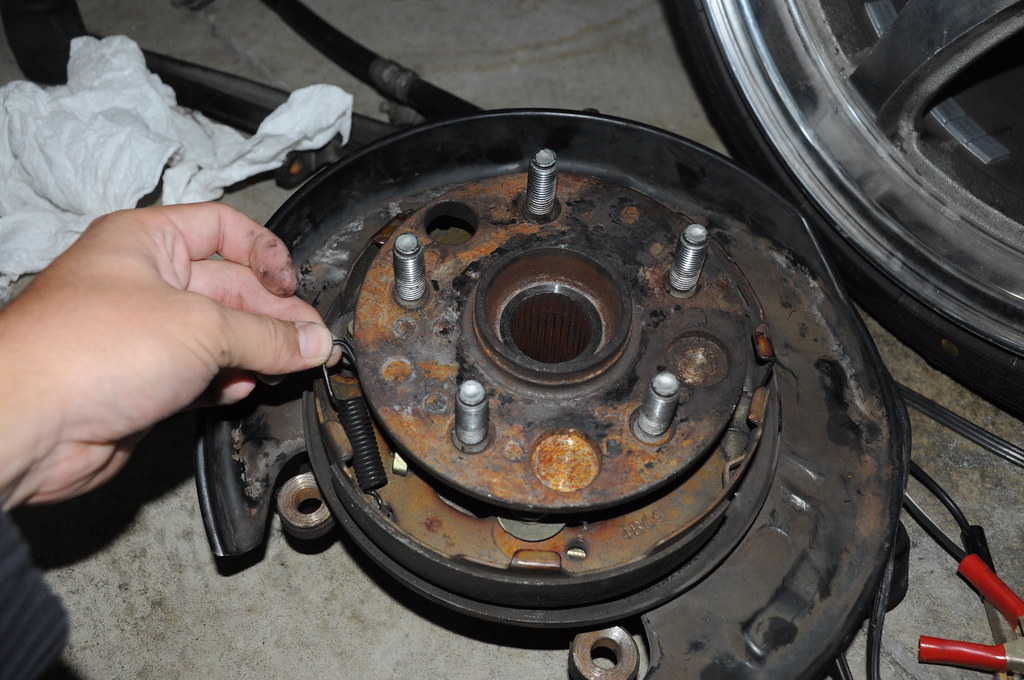
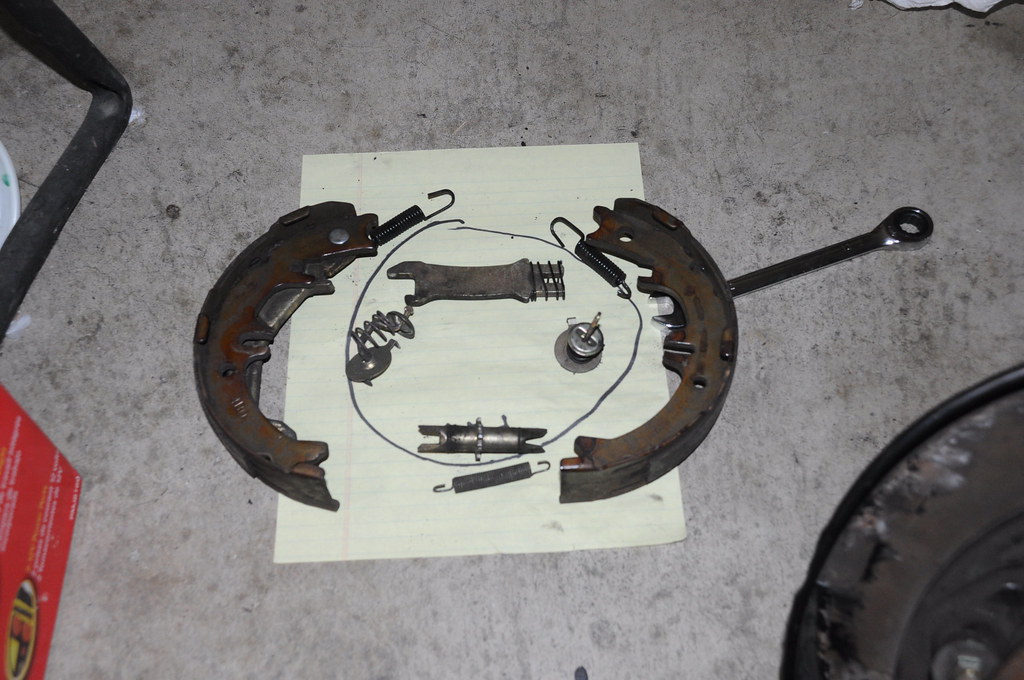
Took off the hub and sent it to a local pep boys to have them press in a new wheel bearing. Got it back a few days later due to my schedule. Started putting on new brake shoes that I had gotten from R1 concepts. %$@#ing stupid brake shoes and the goddamn springs. I will personally falcon punch whoever came up with this goddamn design in the crotch if I ever come across him/her.
Once I was finally done yelling my whole repetoire of curse words at the hub and its brake shoes, I put it all back together onto the car, and trekked 14 miles to Battle Version on the world's worst alignment ever.
I stated my wishes to Mr Alex Pfeiffer: As little camber as possible in the back, as well as more fender clearance to allow for fatter tires sometime down the line. 0 toe all around as well.
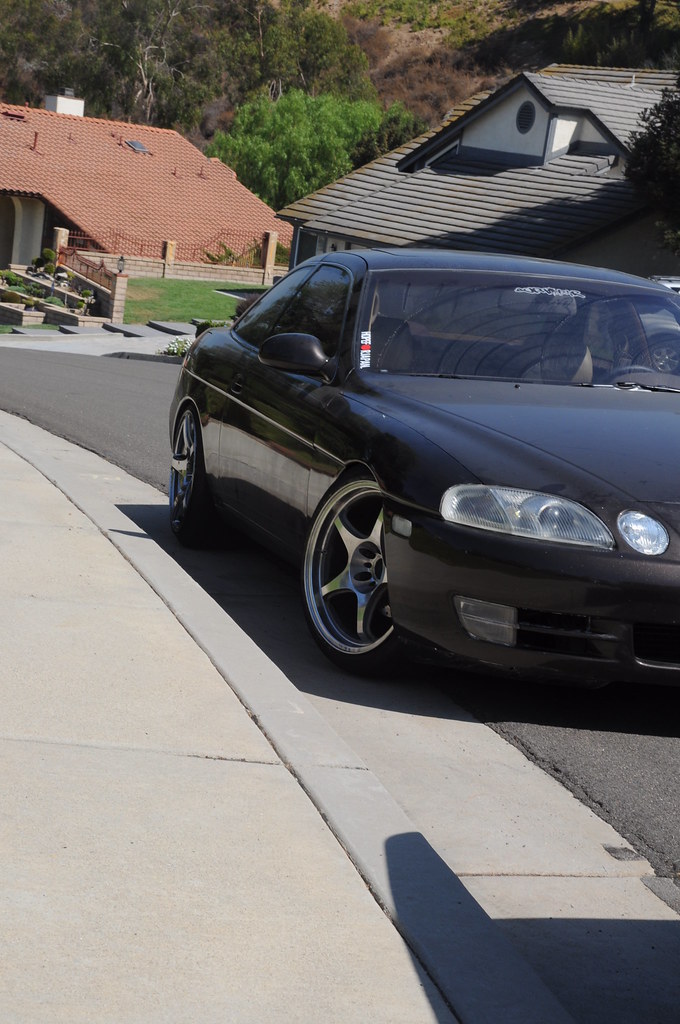
He totally understood because he did had done the same on his car to fit something like 10.5 -1 wheels for the rears of his battle version sc,with pretty meaty tires. After a couple hours of thoroughly going through my car (thankfully, since I never did), he was able to get the specs down to -1.8 camber in the back with still enough room to run a bit more tire, keeping the fronts cambered in at around -4 or -5. The drive home was a blast. The car felt so much more direct, so much lighter, though it was still the 3546lb hunk of metal (as I had found out earlier from battle version's scale when he corner balanced it). I jacked up the car the next night to tweak some things that needed fixing.
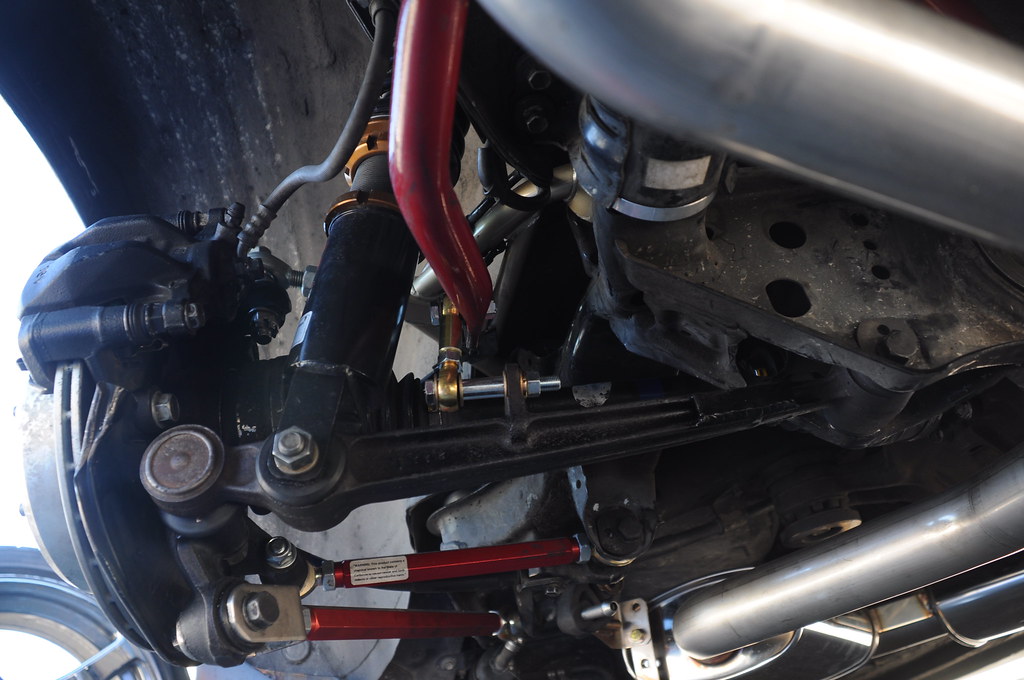
The lca was shortened right around where the reinforcement plates/gussets were welded in near the subframe.
Because shorter lca had a couple noticeable effects. It raised up my rear just a bit due to the lack of negative camber and also the more vertical angle of my coilover. It also brought the coilover closer to the swaybar, enough for the endlink to make contact w/ the coilover.
So, I jacked it up, and moved the endlink to the other side temporarily. A few more fixes will come in just a bit.
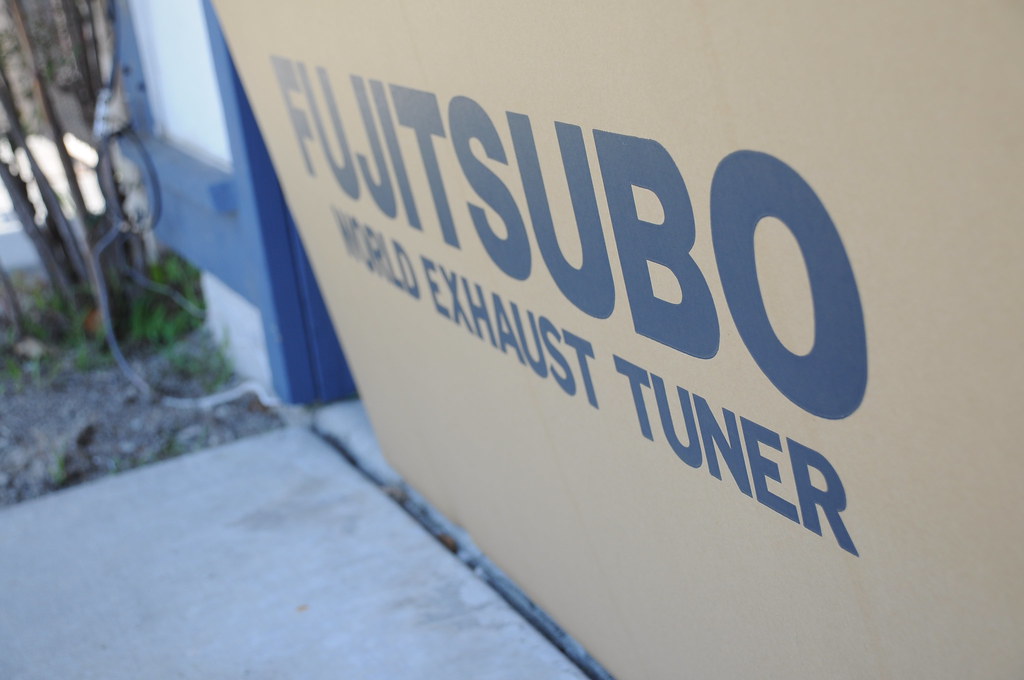
But before that, I decided I'd change up my exhaust game and get rid of the custom y-pipe that I had made a bit over a year ago, and got myself a fujitsubo since they seemed to be clearing them out at tein headquarters 20 miles away from my house. Headed over and picked one up. Ever since I heard the fujitsubo system on a friend's s2000 in high school, I've always wanted one. The subtle yet attractive tone always had me hooked. Few problems though.
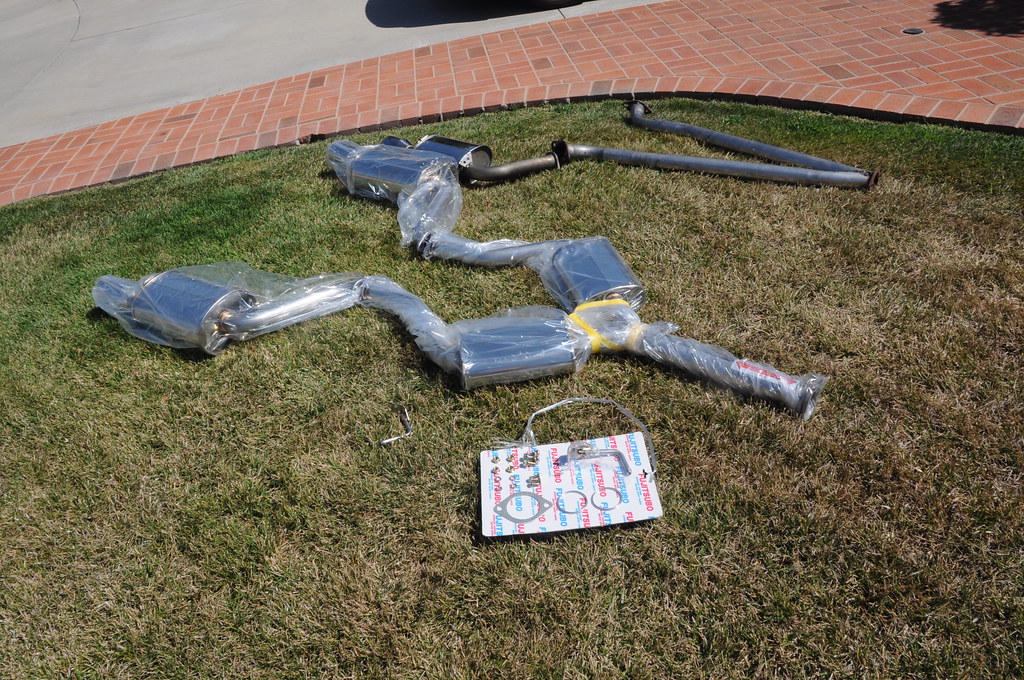
The custom midpipe that led to the cat, which then got bolted onto the fujitsubo catback sytstem, was, well, custom.
The length of the piping that went from the header to the 2nd cat was different from stock, so I had to get it modded. The flanges that connected the cat to the y-pipe was also horizontal, instead of angled like stock and the fujitsubo.
Thinking I'll just uninstall it myself and take it over to a muffler shop to have 12" or so hacked off, I took the pipe off the car, only to see one of the shittiest piping work ever. I didn't take a pic just because it was a pain to look at, but at the bends, the straight portion of the piping continued through the bend so what should have been a 2.5" piping was now cut in half due to piping being inside the opening of the piping, if that makes any sense . It didn't help that the welds looked like diseased and dying gorillas somehow got hold of harbor freight arc welders and went to town on the joints.
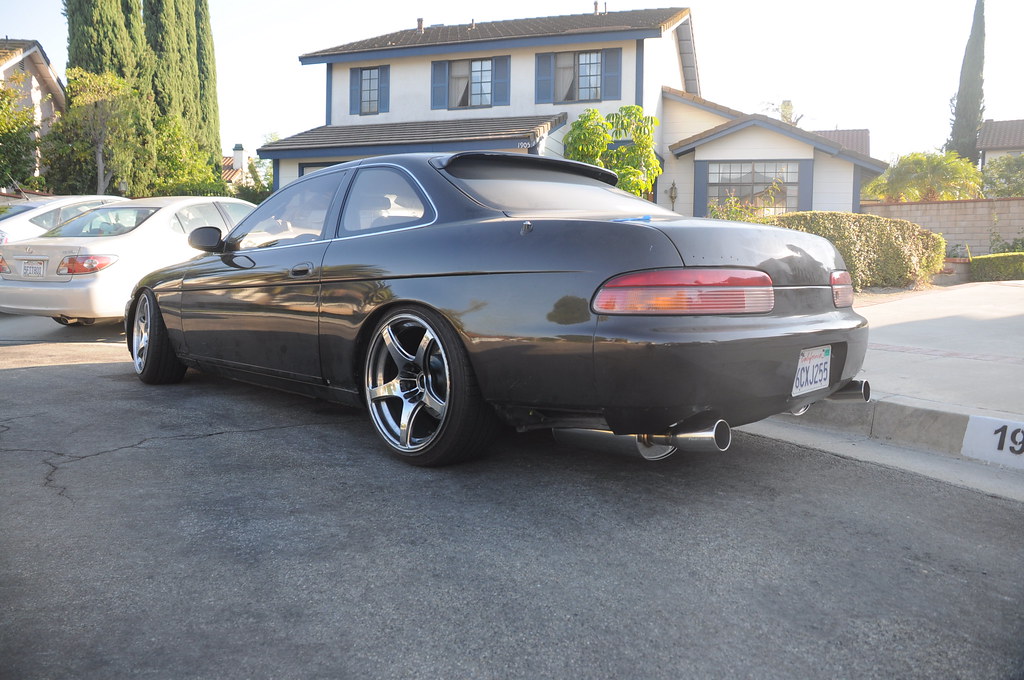
So, I put it back on, and drove it over to a different muffler shop than the one that originally made me the y-pipe and had them make me a whole new front portion, going from the cat on the header to the 2nd cat on the midpipe. They also replaced my now very smashed up cat with a smaller cat so that I wouldn't scrape it on lane dividers anymore. Had them install everything and I started it up. At first, i thought it was stock because the tone was so quiet, but after a drive around the block, I liked it. A group of e30 m3's that had come to get work done stared as i quietly drove off. Seeing as fujitsubo used resonators that trump the stock resonators in size, the quiet tone didn't really come as a huge surprise.
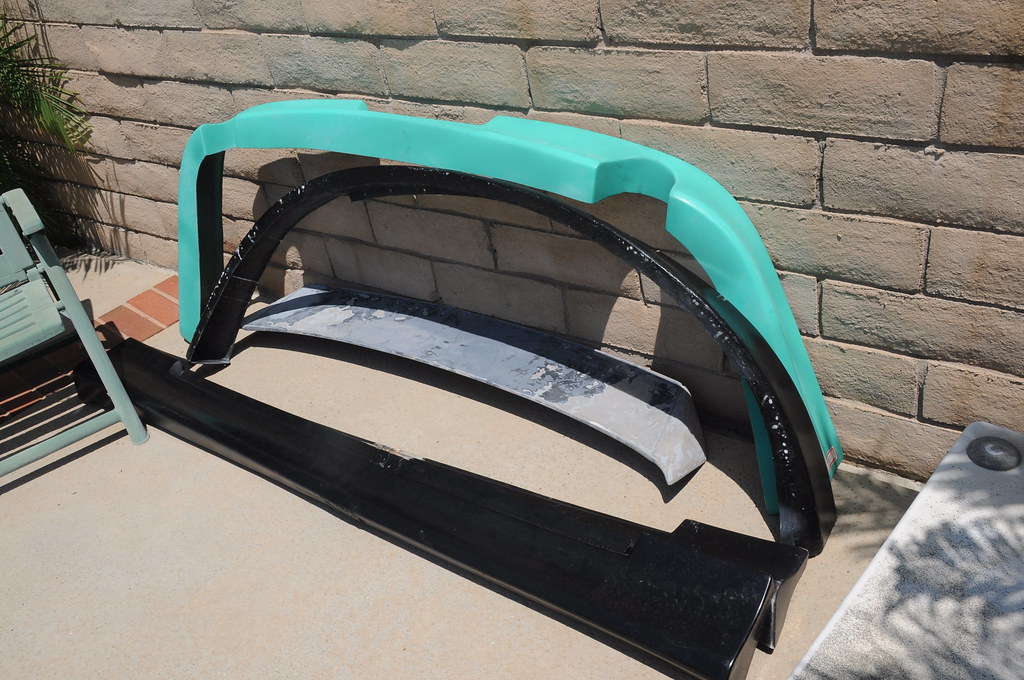
Another reason why I got the y-pipe re-done was because the y-pipe that was customed was a bit too short, so it pulled the axleback back, and in doing so, because of the swinging motion of the axleback hangers, it also pulled it up. This cut into the clearance that should be there for a rear lip, so getting it all redone was perfect. Painted the remaining parts of my kit that were still unpainted and slapped them on.
After a couple more cans of gloss black rustoleum and duplicolor clearcoat, they went on.
Once I get the wise wing's primer to work well with the paint, I'll be putting it on and giving the sc a wash for the first time in a couple years.
|


 RSS Feed